Picture this: You’ve just opened a jar of homemade strawberry jam, and the sweet, rich fragrance fills your kitchen. It’s like a jar of summer captured in a spreadable form, ready to be slathered on toast or stirred into yogurt. Making strawberry jam with pectin is an easy and rewarding process that will leave you with delicious, homemade jam all year long. Whether you’re preserving the season’s freshest berries or recreating a recipe passed down through generations, you’ll find joy in every step of this process.
In this guide, I’ll walk you through everything you need to know to make strawberry jam with pectin—from choosing the right ingredients to canning your jam for long-term enjoyment. Let’s dive in!
How to Make Strawberry Jam With Pectin – A Foolproof Recipe
Why Use Pectin in Strawberry Jam?
You might be wondering, why add pectin at all? Isn’t fruit naturally filled with pectin? While it’s true that pectin occurs naturally in fruits, adding extra pectin helps achieve the perfect consistency for your jam without lengthy cooking times.
Pectin is a natural gelling agent that’s essential for setting the jam properly. It helps thicken the mixture, ensuring that it gels beautifully into a spreadable texture. Using commercial liquid pectin in your strawberry jam will result in a smoother texture and allow you to preserve the fresh flavor of the fruit without overcooking.
There are two types of pectin you can use: natural pectin, which comes from fruits like apples, or commercial pectin, which is typically derived from citrus. For this recipe, we’ll be using liquid pectin for its ease of use and guaranteed results.
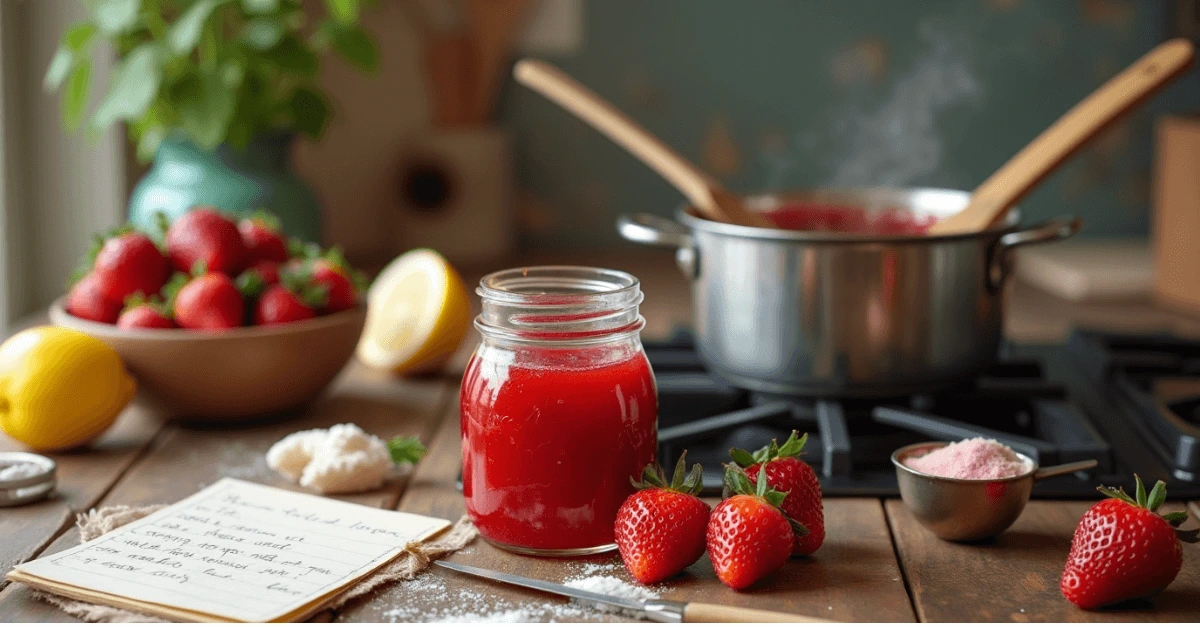
Ingredients & Tools You’ll Need
Let’s gather everything you need for making your jam! Here’s a handy list of ingredients and tools:
Ingredients Table for Easy Reference
| Ingredient | Quantity | Notes |
|---|---|---|
| Fresh strawberries | 4 cups (chopped) | Choose ripe, juicy strawberries for maximum flavor |
| Granulated sugar | 3 cups | Essential for sweetness and preservation |
| Liquid pectin | 1 pouch (3 oz) | Ensures a perfect set every time |
| Lemon juice | 2 tbsp | Adds balance and prevents the jam from being too sweet |
| Butter (optional) | 1/2 tsp | Helps reduce foam formation during cooking |

Essential Kitchen Tools
- Large pot: A wide, heavy-bottomed pot works best for cooking your jam.
- Wooden spoon: For stirring your jam mixture, wooden spoons help prevent the jam from sticking.
- Canning jars & lids: Ensure you have sterilized jars to store your jam.
- Ladle & funnel: Helps pour the jam into jars without making a mess.
- Potato masher: Use this for mashing the strawberries to release their natural juices.
Step-by-Step Guide to Making Strawberry Jam With Pectin
Now that you have all your ingredients and tools ready, let’s start making that delicious jam!
Step 1 – Prepare the Strawberries
Start by washing your strawberries thoroughly. Remove the green stems and hull the berries. Once they’re cleaned and prepped, chop them into small pieces, making sure to leave some chunks for texture. If you prefer a smoother jam, mash the strawberries with a potato masher until you have a mix of pulp and juice.
Step 2 – Cooking the Jam Mixture
In your large pot, combine the chopped strawberries, granulated sugar, and lemon juice. Stir the mixture over medium heat until the sugar has dissolved completely. Once dissolved, increase the heat and bring the mixture to a rolling boil. You want the mixture to bubble up and keep stirring frequently to avoid burning.
Once boiling, you’ll notice the color of the strawberries intensify. The smell will be heavenly! This process should take around 5-10 minutes. Keep a close eye on it.
Step 3 – Add Pectin for the Perfect Set
When the jam reaches a rolling boil, it’s time to add the liquid pectin. Pour in the pouch of liquid pectin and stir it in quickly. Let the jam continue to boil for an additional 1-2 minutes while stirring constantly. This short boil ensures that the pectin has fully integrated into the mixture, setting the jam without making it too firm.
Optional: If you notice foam forming at the top of the jam, add a small amount of butter (about 1/2 teaspoon). This will help reduce the foam and keep your jam smooth and clear.
Step 4 – Canning and Storing
Now that your jam is ready, it’s time to can it for long-term storage. Sterilize your canning jars by boiling them in water for 10 minutes or running them through the dishwasher on the hottest cycle. Use a ladle to carefully pour the hot jam into your sterilized jars, leaving about ¼ inch of space at the top. Wipe the rims of the jars clean with a damp cloth to ensure a proper seal.
Once the jars are filled, seal them with the lids and process them in a boiling water bath for 10 minutes. This will help to create a vacuum seal and ensure your jam stays fresh for months.
Allow the jars to cool to room temperature, then check the seals. Once sealed, store your jam in a cool, dark place. If any jars haven’t sealed, simply refrigerate them and use within a few weeks.

Expert Tips for the Best Strawberry Jam With Pectin
Common Mistakes to Avoid
- Using unripe strawberries: Unripe berries are less sweet and contain less pectin, resulting in a jam that’s both too tart and runny. Always use ripe, juicy strawberries for the best flavor.
- Overcooking the jam: Overcooking can result in a jam that’s too thick, almost like candy. Keep an eye on the boiling time and follow the recipe for the best consistency.
- Not using enough pectin: If you underuse pectin, your jam may not set properly. Follow the recipe’s exact measurements for the best results.
How to Store & Preserve Your Homemade Jam
Once you’ve made your jam, you’ll want to store it properly to enjoy it for months to come. Here are a few key tips:
- Refrigeration: If you don’t plan on canning your jam, store it in the fridge. It will stay fresh for up to 3-4 weeks.
- Canning: Canning preserves the jam for up to a year, as long as the jars remain sealed. Make sure the seals are tight before storing them in a cool, dark place.
- Signs of Spoilage: Homemade jam can spoil if not stored properly. Keep an eye out for mold or any off smells, and always check that the seal is intact before opening a jar.
Frequently Asked Questions About Strawberry Jam With Pectin
Can I Make This Recipe Without Pectin?
Yes! If you prefer to make strawberry jam without commercial pectin, you can rely on the natural pectin found in the strawberries themselves. However, this will require longer cooking times to achieve the desired consistency. For a quicker set, I recommend using pectin, especially if you’re new to jam-making.
Why Is My Strawberry Jam Too Runny?
If your jam is too runny, it may be due to insufficient cooking time or not enough pectin. You can always reheat the jam and add more pectin to help it set properly. Another option is to cook the jam a little longer to help it thicken.
Can I Reduce the Sugar in This Recipe?
Yes, you can reduce the sugar in the recipe, but be aware that sugar helps with both the flavor and preservation of the jam. If you reduce the sugar too much, the jam may not set properly, and its shelf life could be shorter. For a healthier option, you can substitute some of the sugar with a natural sweetener like honey, though this may affect the consistency.
What’s the Best Way to Sterilize Jars?
Sterilizing jars is essential for long-term storage. You can sterilize your jars by boiling them in water for 10 minutes or placing them in a hot oven for 15 minutes at 250°F. Be sure to let them cool before filling with jam.
Conclusion – Enjoy Your Homemade Strawberry Jam
Making strawberry jam with pectin is a fun and satisfying process that results in a delicious homemade treat. Whether you’re using it for yourself or sharing it with friends and family, homemade jam will always have a special place in your kitchen. With the step-by-step process outlined in this guide, you’ll be able to make strawberry jam that’s perfectly set, bursting with fresh flavor, and ready for any occasion.
Now it’s time to give this recipe a try! Gather your ingredients, follow the steps, and share your jam-making experience with others. Happy canning!