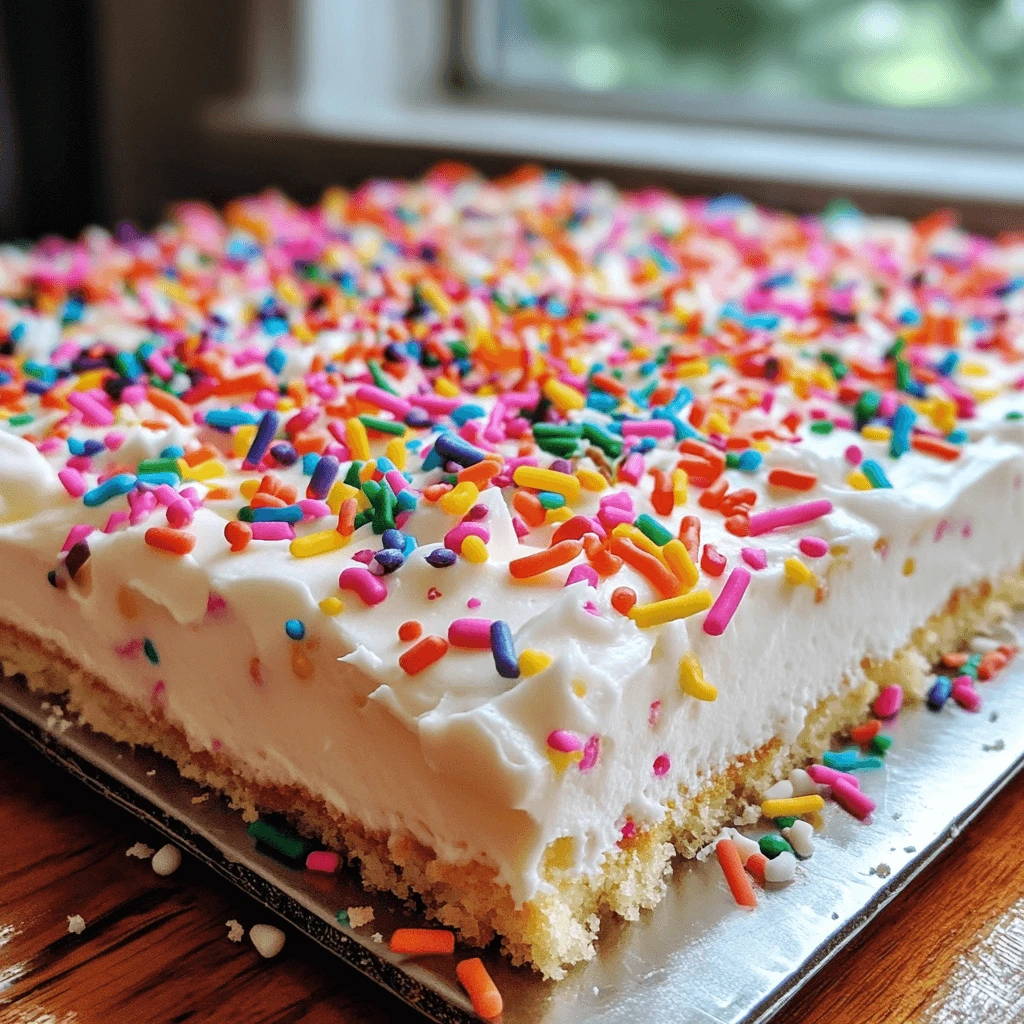
Kefir sheet cake is a delicious and healthier twist on the classic dessert. The cake becomes moist and fluffy thanks to kefir’s natural fermentation. This probiotic-rich ingredient adds a unique tang that enhances the flavor. In this guide, you’ll learn how to bake the perfect kefir sheet cake using simple ingredients. The recipe is easy to follow and perfect for beginners and experienced bakers alike. Whether you’re preparing for a special occasion or just want a tasty treat, this kefir sheet cake will be a hit. Let’s get started and create a dessert everyone will love!

What is Kefir and Why Use It in Baking?
Understanding Kefir: A Tangy and Healthy Fermented Dairy Product
Kefir is a fermented dairy product that has been enjoyed for centuries. It is made by fermenting milk with kefir grains, a combination of bacteria and yeast. These grains help break down lactose, which makes kefir easier to digest for some people. Kefir has a tangy flavor and a creamy texture, similar to drinkable yogurt.
Probiotic Content:
Kefir is rich in probiotics—live bacteria and yeast that offer health benefits. These probiotics help maintain a healthy gut by supporting digestion and immune function. Kefir contains a wide range of probiotics, including Lactobacillus, Bifidobacterium, and Saccharomyces, which make it a powerful tool for promoting digestive health.
Health Benefits:
Kefir offers several health benefits, especially due to its probiotics. Regularly consuming kefir can improve digestion and reduce symptoms like bloating or constipation. It also supports the immune system by boosting the body’s natural defenses.
Kefir is a great source of protein, calcium, and B vitamins. These nutrients promote bone health, muscle function, and energy levels. It may also help reduce inflammation, which can benefit those with conditions like arthritis or inflammatory bowel disease. For those who are lactose intolerant, kefir is often easier to digest than regular milk. The fermentation process reduces lactose, making it a suitable option for many people.
Overall, kefir is a nutritious ingredient that supports gut health and offers a wide range of benefits. Whether consumed on its own or used in recipes, it is a great addition to a healthy diet.
Why Kefir Adds Moisture and Fluffiness to Your Cakes
Kefir is a fantastic ingredient for cakes, offering several benefits that enhance the final product. From adding moisture and fluffiness to providing a tangy flavor that balances sweetness, kefir helps create a cake that is both delicious and light.
Adding Moisture to Cakes
One of the key reasons kefir works well in cakes is its ability to provide moisture. The high water content in kefir helps keep the cake soft and tender. Cakes made with kefir tend to retain their moisture for longer, ensuring they stay fresh even after a few days. This moisture also prevents the cake from becoming dry, a common issue in many baked goods.
Creating Fluffiness
Kefir also contributes to the fluffiness of the cake. The natural acidity of kefir reacts with baking soda or baking powder, releasing carbon dioxide. This reaction helps the batter rise and results in a light, airy texture. The fermentation process in kefir also helps tenderize the gluten in the flour, creating a soft and delicate crumb that melts in your mouth.
Balancing Sweetness with Tangy Flavor
Another great feature of kefir is its subtle tangy flavor, which complements the sweetness of the cake. The slight acidity in kefir provides a refreshing contrast to sugary ingredients like frosting or fruit, creating a more balanced and complex flavor. This tangy note also allows other flavors in the cake—such as vanilla, citrus zest, or spices—to stand out.
Kefir’s tanginess enhances the overall flavor of the cake without making it overly sweet. This makes kefir-based cakes more flavorful and refreshing, with a well-rounded taste that is sure to please everyone. The tangy flavor pairs particularly well with fruit or citrus cakes, offering a delightful contrast.
In summary, kefir is an excellent choice for baking cakes. It adds moisture and fluffiness, improves the texture, and balances the sweetness with its tangy flavor. By using kefir in your cake recipes, you’ll achieve a lighter, more flavorful dessert that stands out from the rest.
Kefir vs. Other Dairy Products
When it comes to baking, choosing the right dairy product can significantly affect the texture and flavor of your cakes. While milk, yogurt, and buttermilk are commonly used in baking, kefir offers unique qualities that set it apart. Let’s explore how kefir compares to these dairy options and why it may be the best choice for your next cake.
Kefir vs. Milk
Milk is a staple ingredient in many cake recipes, providing moisture and fat to the batter. However, kefir has some advantages over milk in baking. Kefir’s higher water content makes it an excellent choice for keeping cakes moist and tender for longer periods. Milk, while effective in moisturizing, lacks the complexity and tanginess that kefir offers.
Additionally, kefir is packed with probiotics—beneficial bacteria and yeast that contribute to gut health. Milk doesn’t have these probiotics, making kefir a healthier alternative if you’re looking to boost the nutritional value of your cake. The tangy flavor of kefir also adds a layer of interest to the cake’s taste, balancing out sweetness and providing a more nuanced flavor profile.
Kefir vs. Yogurt
Both kefir and yogurt are fermented dairy products, but they have distinct differences in texture, flavor, and probiotic content. Kefir is typically more liquid than yogurt, making it easier to incorporate into cake batters without altering the consistency too much. Yogurt, on the other hand, is thicker and might require the addition of extra liquid to achieve the desired cake batter consistency.
Kefir also has a greater variety of probiotics compared to yogurt. The broader spectrum of beneficial bacteria and yeast in kefir can enhance digestion and offer additional health benefits that yogurt doesn’t provide. While both ingredients contribute moisture and richness to the cake, kefir’s tangy flavor is more pronounced, offering a stronger flavor contrast to the sweetness of the cake.
Kefir vs. Buttermilk
Buttermilk is a common ingredient in cakes, known for its acidity, which reacts with baking soda or baking powder to create a light, airy texture. However, kefir shares a similar acidity and leavening reaction with buttermilk, but it offers a key difference—live cultures. Kefir’s probiotic content adds extra health benefits that buttermilk lacks, making it a more nutritious option.
The flavor of kefir is also more tangy and complex than buttermilk, which can enhance the overall flavor of the cake. While both ingredients provide a tender crumb, kefir adds more depth and character to the cake’s taste.
Which Dairy Product is Best for Baking?
While each of these dairy products has its advantages, kefir stands out as the best choice for baking cakes. Its moisture-retaining properties, rich probiotic content, and tangy flavor provide benefits that milk, yogurt, and buttermilk can’t match. Kefir enhances not only the texture and moisture of the cake but also contributes to its overall flavor profile, making it an ideal addition to your baking repertoire.
In conclusion, kefir is a versatile and health-boosting ingredient that elevates the quality of baked goods. If you’re looking to create a cake with a perfect texture, enhanced flavor, and nutritional benefits, kefir is the dairy product to choose.
Ingredients for a Perfect Kefir Sheet Cake
Essential Ingredients
When making a kefir sheet cake, several key ingredients come together to create the perfect texture, flavor, and structure. Each ingredient plays a vital role, ensuring the cake turns out moist, fluffy, and delicious. Let’s break down the essential ingredients that are needed to make a perfect kefir sheet cake.
Kefir
Kefir is the star ingredient of this cake, adding moisture and a slight tanginess that enhances the flavor. The high water content in kefir helps the cake stay moist and tender, while its natural acidity contributes to a lighter, fluffier texture. Additionally, kefir’s probiotics bring health benefits, making this cake not only delicious but also a nutritious option. The tangy flavor of kefir contrasts with the sweetness of the other ingredients, creating a balanced and complex taste profile.
Flour
Flour is the foundation of any cake batter, providing the structure and bulk needed to hold everything together. For this kefir sheet cake, all-purpose flour is typically used, as it gives the cake a soft, light texture. The proteins in the flour (mainly gluten) form the structure of the cake, helping it rise when combined with leavening agents like baking powder. Too much flour can make the cake dense, while too little can cause it to fall apart. The right balance is essential for achieving the perfect crumb.
Sugar
Sugar not only sweetens the cake but also contributes to its texture and color. It helps retain moisture in the cake, keeping it soft and preventing it from drying out. When mixed with fat (like butter or oil), sugar also helps create a light and fluffy texture by trapping air. In this recipe, granulated sugar is commonly used, but you can experiment with other sweeteners like honey or brown sugar to add unique flavors. The sweetness from the sugar pairs beautifully with the tanginess of the kefir, creating a harmonious flavor balance.
Eggs
Eggs are crucial for binding the ingredients together and providing structure to the cake. They contribute to the cake’s rise and help give it a tender, airy texture. The proteins in eggs help form the cake’s structure, while the fats add moisture and richness. Eggs also act as emulsifiers, ensuring that the fat and liquid ingredients combine smoothly in the batter. For a fluffier cake, it’s essential to beat the eggs well, incorporating air into the batter.
Baking Powder
Baking powder is the leavening agent that makes the cake rise. It contains both an acid (cream of tartar) and a base (baking soda), which react when mixed with the liquid ingredients, producing carbon dioxide bubbles. These bubbles expand during baking, helping the cake rise and giving it a light and airy texture. It’s important to use the right amount of baking powder—too much can cause the cake to rise too quickly and then collapse, while too little will result in a dense, heavy cake. For best results, ensure your baking powder is fresh and properly measured.
Butter or Oil
Fat, in the form of butter or oil, adds moisture and richness to the cake. Butter imparts a delicious flavor and a tender crumb, while oil creates an even softer texture. Both fats contribute to the overall texture of the cake, ensuring it’s not dry or crumbly. Butter also helps with browning the cake during baking, giving it a golden, appetizing appearance. The choice between butter and oil depends on personal preference, but both work well in creating a moist, flavorful cake.
Vanilla Extract
While not a mandatory ingredient, vanilla extract is often used to enhance the overall flavor of the cake. Vanilla adds a subtle sweetness and aromatic depth that complements the tanginess of the kefir and balances the flavors. A teaspoon of pure vanilla extract is usually sufficient to elevate the flavor profile of your kefir sheet cake. You can also experiment with other extracts, like almond or lemon, to add a unique twist to the cake.
Salt
Salt is a small but important ingredient in baking. It helps balance the sweetness of the sugar and enhances the flavors of the other ingredients. A pinch of salt can make a significant difference in the taste of the cake, preventing it from being too sweet or flat. It also strengthens the structure of the cake by interacting with the flour proteins, contributing to a firmer crumb.
Final Thoughts on Essential Ingredients
Each of these essential ingredients plays a specific role in creating the perfect kefir sheet cake. Kefir provides moisture and tanginess, flour forms the structure, sugar sweetens and moistens, eggs add richness and stability, and baking powder ensures a light and fluffy texture. With the right balance of these ingredients, you can create a delicious, moist, and healthy cake that is sure to be a hit. By understanding the role of each ingredient, you can easily adapt the recipe and create variations that suit your taste and preferences.
Optional Variations and Add-ins
While a classic kefir sheet cake is delicious on its own, there are plenty of ways to customize the recipe to suit your tastes or add a unique twist. Whether you’re in the mood for a fruitier cake, a spiced-up version, or a bit of crunch from nuts, there are endless possibilities to make your kefir cake even more flavorful. Let’s explore some optional variations and add-ins that can elevate your kefir sheet cake.
Fruits to Add
Adding fresh or dried fruit to your kefir sheet cake can enhance its flavor and texture, giving it a refreshing, natural sweetness. Here are a few fruit options that pair perfectly with kefir:
- Berries: Blueberries, raspberries, or blackberries bring a burst of juicy flavor and a pop of color to the cake. Berries are slightly tart, which complements the tangy kefir, and they bake wonderfully into the batter without losing their shape. You can use fresh or frozen berries, though if using frozen, be sure to toss them in a little flour before adding them to the batter to prevent them from sinking to the bottom.
- Bananas: Mashed bananas are a great option for adding natural sweetness and moisture. They pair exceptionally well with the tangy flavor of kefir and contribute to a soft, moist crumb. For an added touch, consider adding a few sliced banana pieces on top of the cake before baking for a decorative and flavorful finish.
- Citrus: Zesting lemons, oranges, or limes and adding their juice to the batter can provide a refreshing citrusy zing that balances the creaminess of the kefir. Lemon and kefir, in particular, create a wonderful flavor combination. You can even layer thin slices of citrus fruits on top for a beautiful, aromatic finish.
- Apples: Chopped apples, particularly tart varieties like Granny Smith, add texture and moisture. Apples work well in a kefir sheet cake, giving it a cozy, autumnal vibe. Cinnamon pairs beautifully with apples, so consider adding a pinch of cinnamon for extra flavor.
Nuts for Texture and Crunch
If you enjoy a bit of crunch in your cake, adding nuts is a great way to boost the texture and provide a delightful contrast to the soft, moist crumb. Here are some nuts that work well in kefir sheet cakes:
- Walnuts: Walnuts bring a slightly bitter, earthy flavor that pairs beautifully with the tang of kefir and the sweetness of fruits. They add a satisfying crunch and are a classic choice for cakes, especially when combined with banana or chocolate.
- Almonds: Slivered or chopped almonds add a delicate crunch and a mild, nutty flavor that complements the tangy kefir. Almonds also pair well with citrus flavors, making them a great choice for cakes that feature lemon or orange.
- Pecans: Pecans have a rich, buttery flavor that adds a touch of decadence to the cake. They work well in cakes that feature autumn-inspired ingredients like apples, cinnamon, or maple syrup.
- Hazelnuts: Hazelnuts offer a unique, slightly sweet flavor with a crunchy texture. They are an excellent addition if you want to add an exotic twist to your kefir cake, and they pair well with chocolate or coffee flavors.
Spices for Warmth and Depth
Spices can take your kefir sheet cake to the next level by adding warmth and depth to its flavor profile. Depending on your preferences, you can experiment with a range of spices to create a cake that suits any season or occasion.
- Cinnamon: A classic addition, cinnamon adds warmth and a cozy, comforting aroma. It pairs especially well with apples, bananas, and walnuts. A pinch of cinnamon in the batter or sprinkled on top before baking can enhance the flavor and provide a fragrant aroma.
- Nutmeg: Nutmeg adds a slightly sweet, spicy flavor that complements the tang of kefir. A small amount of ground nutmeg can make a big difference in your cake’s flavor. It pairs well with cinnamon and other warm spices for a cozy, spiced cake.
- Ginger: Fresh or ground ginger adds a zesty kick to the cake. It enhances the tanginess of the kefir and adds a lively flavor. Ginger works wonderfully with citrus fruits like lemon and orange, as well as with more exotic spices like cardamom or cloves.
- Cardamom: If you’re looking for a more exotic spice, cardamom is a great option. Its fragrant, citrusy notes can add a unique twist to your kefir sheet cake. Cardamom pairs especially well with berries or citrus fruits and gives your cake an aromatic, sophisticated flavor.
Chocolate for a Decadent Touch
For those who love chocolate, adding cocoa powder or chocolate chips to the kefir sheet cake is an easy way to indulge your sweet tooth. Cocoa powder adds depth to the flavor, making the cake rich and slightly bittersweet. Chocolate chips or chunks melt during baking, creating pockets of gooey, melty chocolate throughout the cake.
- Dark Chocolate: If you prefer a less sweet, more refined taste, opt for dark chocolate chips. The slight bitterness of dark chocolate pairs beautifully with the tangy kefir and the sweetness of the cake.
- Milk Chocolate: For a sweeter, creamier flavor, milk chocolate chips are a great choice. They melt beautifully in the cake, adding a rich, velvety texture.
Herbs for an Unexpected Twist
Herbs might not be the first thing that comes to mind when thinking of cake, but certain herbs can provide a delightful, unexpected flavor. Consider adding finely chopped fresh herbs like basil, thyme, or rosemary to your kefir sheet cake. These herbs work particularly well when paired with citrus, berries, or nuts, adding a refreshing and aromatic twist to your baked creation.
Final Thoughts on Optional Add-ins and Variations
There are countless ways to customize your kefir sheet cake, whether you want to add fruits, nuts, spices, or even chocolate. Experimenting with different combinations allows you to create a cake that fits your flavor preferences and mood. From the refreshing zing of citrus to the cozy warmth of cinnamon, each variation brings something special to the table. With these optional add-ins, your kefir sheet cake will not only taste amazing but also look visually stunning, making it the perfect treat for any occasion
Dietary Substitutes
When baking a kefir sheet cake, it’s important to consider dietary preferences and restrictions. Whether you’re baking for someone with gluten sensitivities, following a vegan lifestyle, or trying to reduce sugar intake, there are various substitutions you can make without compromising the flavor or texture of the cake. Let’s explore some dietary substitutes that allow you to make a delicious kefir sheet cake suitable for different dietary needs.
Gluten-Free Alternatives
For those who follow a gluten-free diet, you can still enjoy a fluffy, moist kefir sheet cake by making a few ingredient swaps. Here are some gluten-free options to try:
- Gluten-Free Flour Blends: The easiest substitute for all-purpose flour is a gluten-free flour blend. These blends are usually made from a combination of rice flour, potato starch, and tapioca flour, and they mimic the texture of regular flour. Many gluten-free flour blends also contain xanthan gum or guar gum, which helps the cake maintain its structure and rise. When using a gluten-free flour blend, make sure to follow the ratio recommended on the package.
- Almond Flour: Almond flour can add moisture and a slight nutty flavor to your kefir cake. It’s a great gluten-free option that works especially well in cakes with fruit or nuts. However, almond flour doesn’t rise as well as all-purpose or gluten-free blends, so you might need to use extra leavening agents like baking powder or baking soda.
- Rice Flour and Cornstarch: If you don’t have a gluten-free blend on hand, you can substitute a combination of rice flour and cornstarch. The rice flour provides the bulk of the structure, while the cornstarch helps with the cake’s texture and tenderness. Be sure to adjust the amounts to achieve the right consistency.
- Tapioca Flour: Tapioca flour is another excellent gluten-free option that can help bind the ingredients together. It adds chewiness and moisture, making it a great addition to cakes. When using tapioca flour, you might want to combine it with rice flour or almond flour for a better structure.
Low-Sugar Alternatives
If you’re looking to reduce the sugar content in your kefir sheet cake, there are several sugar substitutes that can help achieve the same sweetness without the added calories. Here are some popular low-sugar options:
- Stevia: Stevia is a natural, zero-calorie sweetener that can be used in place of sugar. It’s significantly sweeter than regular sugar, so you’ll need to use much less of it. Be sure to check the conversion ratio on your stevia product to avoid over-sweetening the cake.
- Erythritol: Erythritol is a sugar alcohol that has zero calories and doesn’t spike blood sugar levels. It has a similar taste and texture to sugar, making it an excellent substitute in baked goods. Erythritol is about 70% as sweet as sugar, so you might need to adjust the amount you use to get the desired sweetness.
- Monk Fruit Sweetener: Monk fruit sweetener is another natural, low-calorie alternative that’s derived from the monk fruit. It’s often combined with other sweeteners like erythritol to balance out its taste. Monk fruit sweetener doesn’t raise blood sugar levels and can be used in a 1:1 ratio as a substitute for sugar.
- Applesauce or Mashed Bananas: For a more natural, lower-sugar option, you can use applesauce or mashed bananas to sweeten the cake. These ingredients add moisture as well as a subtle, fruity sweetness. If you use mashed bananas, be mindful of their flavor profile, as it may slightly alter the overall taste of the cake.
- Coconut Sugar: If you prefer to use a natural sugar alternative, coconut sugar is a good option. It has a lower glycemic index than regular sugar and is less processed. While it does have a distinct caramel flavor, it pairs nicely with the tangy kefir and can be used as a 1:1 substitute for granulated sugar.
Vegan Alternatives
For those following a vegan lifestyle, you can easily adapt the kefir sheet cake recipe to be plant-based by swapping out animal-derived ingredients for vegan-friendly alternatives. Here are the best vegan substitutes to use:
- Vegan Kefir: Traditional kefir is made from cow’s milk, but there are plant-based kefir options available, made from coconut, almond, or soy milk. These dairy-free kefir varieties maintain the same tangy flavor and probiotic benefits as regular kefir, making them a perfect replacement in this recipe. Ensure you choose an unsweetened, unflavored variety to keep the balance of flavors intact.
- Egg Substitutes: Eggs provide structure, moisture, and binding in cakes, but there are plenty of plant-based options that can replicate the role of eggs:
- Flaxseed Meal: Mix 1 tablespoon of flaxseed meal with 3 tablespoons of water to create a flax egg. Let the mixture sit for a few minutes until it thickens. Flax eggs work well in most baking recipes, including kefir cakes.
- Chia Seeds: Similar to flaxseed meal, chia seeds can be used to create a chia egg. Mix 1 tablespoon of ground chia seeds with 3 tablespoons of water, and let it sit until it forms a gel-like consistency.
- Applesauce: Use ¼ cup of unsweetened applesauce as a substitute for one egg. Applesauce adds moisture to the cake, helping to maintain a tender crumb.
- Banana: A mashed banana can also replace eggs in baking. Use about ¼ cup of mashed banana per egg. Keep in mind that this may slightly alter the flavor of the cake, but it adds natural sweetness and moisture.
- Butter Substitutes: Instead of dairy butter, use plant-based options like vegan margarine or coconut oil. Vegan butter offers a similar texture and flavor to regular butter and works great in cakes. Coconut oil can also add moisture and a subtle tropical flavor.
- Milk Substitutes: In addition to vegan kefir, you’ll need to swap out regular milk for plant-based milk. Options such as almond milk, soy milk, oat milk, or coconut milk can all be used in place of dairy milk. These non-dairy milks have varying flavors, but unsweetened versions work best for this recipe.
Final Thoughts on Dietary Substitutes
Making dietary substitutions for your kefir sheet cake is easier than it might seem. Whether you’re looking to make the cake gluten-free, lower in sugar, or vegan, there are plenty of options that maintain the cake’s delicious taste and texture. By swapping ingredients like gluten-free flour blends, plant-based kefir, and natural sweeteners, you can create a version of this cake that fits your dietary preferences without sacrificing flavor or quality. These simple adjustments ensure that everyone can enjoy a slice of your delectable kefir sheet cake, no matter their dietary needs.

Key Ingredients for the Perfect Kefir Sheet Cake
Essential Ingredients for Kefir Sheet Cake
Before you dive into making your kefir sheet cake, it’s essential to organize and prepare all of your ingredients and tools. A little bit of preparation will ensure that the baking process goes smoothly and efficiently, resulting in a perfectly baked cake. Here’s how to prepare for baking your kefir sheet cake step-by-step:
Preheat the Oven and Prepare Your Baking Sheet
Starting with a properly preheated oven is crucial for achieving the perfect cake texture and even baking. Follow these steps:
- Preheat the Oven: Set your oven to the recommended temperature (usually around 350°F/175°C) and allow it to fully preheat. Preheating ensures that the batter cooks evenly right from the moment it enters the oven, giving you the desired fluffiness and texture.
- Prepare the Baking Sheet: A sheet cake typically requires a rectangular or square baking pan. If you’re using a standard 9×13-inch pan, that should work perfectly. Grease the pan with butter, oil, or non-stick cooking spray to prevent the cake from sticking to the sides and bottom. Alternatively, you can line the pan with parchment paper, leaving some overhanging edges for easy removal after baking.
- If you’re making a larger or smaller cake, adjust the baking time accordingly. A larger pan might require a slightly shorter baking time, while a smaller pan may need a little extra time. Keep an eye on the cake during the last few minutes of baking to avoid overcooking.
- If you want to add a decorative touch, consider lightly dusting the greased pan with a thin layer of flour or cocoa powder (if you’re making a chocolate cake). This will help the cake easily release from the pan after baking and add a beautiful finish when it’s flipped out.
Gather All Your Ingredients
Baking a cake is all about having everything ready and within reach. Preparing ahead will save time and prevent you from scrambling for ingredients in the middle of the process. Here’s a checklist of ingredients to gather for your kefir sheet cake:
- Dry Ingredients:
- Flour (or gluten-free flour, depending on your dietary preference)
- Baking powder: This is your primary leavening agent that helps the cake rise and become fluffy.
- Baking soda (optional): If you’re using a highly acidic ingredient like kefir, baking soda may help balance the acidity and contribute to a tender crumb.
- Sugar (or sugar substitute, if making a low-sugar version): Granulated sugar is typically used, but you can substitute it with alternatives like stevia, erythritol, or coconut sugar.
- Salt: A small pinch of salt enhances the sweetness and overall flavor of the cake.
- Wet Ingredients:
- Kefir: This is the star of the cake, adding moisture and a tangy flavor. Make sure your kefir is at room temperature for best results.
- Eggs (or egg substitutes for vegan versions): Eggs provide structure and moisture, but you can use flax eggs or chia eggs for a vegan alternative.
- Butter or oil: Use unsalted butter for a rich flavor, or opt for vegetable oil or coconut oil for a dairy-free cake. Make sure the fat is softened (if using butter) for easy incorporation into the batter.
- Vanilla extract: Adds a lovely aromatic flavor that enhances the overall taste of the cake. A teaspoon of vanilla extract goes a long way in providing a subtle depth of flavor.
- Milk or non-dairy milk: In addition to kefir, you may need a small amount of milk (dairy or plant-based) to adjust the batter’s consistency.
- Optional Ingredients:
- Add-ins like fruits, nuts, or chocolate chips: If you plan on incorporating additional ingredients like berries, chopped nuts, or chocolate, make sure these are prepared ahead of time. For fruits like berries, it’s a good idea to coat them in a little flour to prevent them from sinking to the bottom of the cake during baking.
- Spices: If you’re adding cinnamon, nutmeg, or any other spices to enhance flavor, have them ready to be mixed in.
Measure Ingredients Accurately
Baking is a precise science, so it’s important to measure all of your ingredients accurately. Here’s a quick guide on how to measure ingredients properly:
- Flour: Spoon flour into your measuring cup and level it off with a flat edge. Don’t pack the flour into the cup, as this can result in using more flour than needed.
- Sugar: Use the spoon-and-level method for sugar as well. Spoon the sugar into the measuring cup, then level it off with a flat edge.
- Liquids: For wet ingredients like kefir, milk, and oil, use a liquid measuring cup. Fill it to the desired amount and check it at eye level to ensure accuracy.
- Spices and Baking Powder: Use measuring spoons to add small quantities of spices or leavening agents. These ingredients are often added in very small amounts, so accurate measurement is crucial for flavor balance.
Prepare Optional Variations
If you’re adding any optional ingredients, such as fruits, nuts, or spices, now is the time to prepare them.
- Wash and Chop Fruits: If you’re using fresh fruit like berries, apples, or bananas, wash and chop them into uniform pieces. This will ensure that the fruit bakes evenly into the cake and adds to its overall texture.
- Toast Nuts: If you’re using nuts like walnuts, almonds, or pecans, consider toasting them lightly in a dry pan to bring out their natural flavor. Toasted nuts also add a deeper crunch and aroma when incorporated into the cake.
- Measure and Prepare Add-ins: If you’re using chocolate chips, dried fruit, or any other add-ins, measure them out in advance and set them aside, so they’re ready to stir into the batter.
Set Up Your Workspace
Before you begin mixing your ingredients, organize your workspace to ensure everything runs smoothly:
- Clear your countertop and gather your mixing bowls, measuring cups, spatulas, and whisks.
- Place your baking pan nearby, so you can easily pour the batter in once it’s ready.
- Keep a timer handy to track the baking time and ensure your cake doesn’t overcook.
By preparing in advance and gathering everything you need, you can focus on mixing the ingredients and baking the cake without interruption. This level of preparation ensures that your kefir sheet cake turns out perfectly every time.
Mixing the Batter
Once your ingredients are prepared and your oven is preheated, it’s time to start mixing the batter. Mixing is one of the most important steps in cake-making, as it determines the texture and consistency of your cake. Here’s a step-by-step guide on how to combine the wet and dry ingredients, along with tips for achieving a smooth batter while avoiding overmixing.
Step-by-Step Guide on Combining Wet and Dry Ingredients
Properly combining the wet and dry ingredients is crucial for achieving a smooth, lump-free batter. Follow these steps carefully:
- Mix the Dry Ingredients First
Start by sifting together the dry ingredients in a separate bowl. This helps to ensure that the flour, baking powder, and other dry ingredients are evenly distributed and free of clumps. It also aerates the dry ingredients, which helps create a light and fluffy texture in the cake.- Flour: Sift the flour to remove any lumps and ensure even distribution.
- Baking Powder and Baking Soda: If you’re using both, sift them with the flour to ensure that they’re mixed evenly throughout the batter.
- Salt and Sugar: Mix the salt and sugar into the dry ingredients to make sure they are evenly dispersed.
- Prepare the Wet Ingredients
In a separate bowl, whisk together the wet ingredients until smooth and well-combined. Start with the liquids, such as the kefir, milk, and any oils or melted butter. Then add the eggs (or egg substitutes) and vanilla extract. Whisk the mixture until it’s uniform and smooth.- Kefir: Make sure the kefir is at room temperature, as it helps to mix better and prevents clumps from forming.
- Butter or Oil: If you’re using butter, make sure it’s softened, not melted, unless the recipe calls for it.
- Eggs: If you’re using eggs, beat them lightly before adding them to the wet mixture to help incorporate them smoothly.
- Gradually Add the Wet Ingredients to the Dry Ingredients
Slowly pour the wet ingredients into the dry ingredients, mixing gently as you go. Use a spatula or wooden spoon to stir, starting from the center and working your way out to the edges. This will help ensure that the batter stays smooth and doesn’t form clumps.- Add in Portions: Pouring the wet mixture in increments instead of all at once will help prevent the flour from clumping together.
- Gently Fold: Stir the mixture gently to avoid overworking the batter. The goal is to combine the ingredients, not to beat them. Overmixing can result in a dense or tough cake.
- Incorporate Optional Ingredients
If you’re adding any optional ingredients like chopped nuts, berries, or chocolate chips, gently fold them into the batter once the wet and dry ingredients are fully combined. Make sure they’re evenly distributed but avoid stirring too vigorously, as this could deflate the batter.- Coat Add-ins in Flour: If you’re adding fruits like berries, it’s helpful to coat them lightly in flour before folding them into the batter. This helps prevent them from sinking to the bottom of the cake during baking.
- Check the Consistency of the Batter
Once everything is mixed together, the batter should be smooth, with no visible dry pockets of flour. The consistency should be thick enough to hold its shape but still pourable. If it’s too thick, you can add a little more milk or kefir to adjust the texture. On the other hand, if the batter is too runny, you can add a little more flour to thicken it.- Avoid Lumps: Make sure there are no pockets of dry ingredients left in the batter. If you spot any, gently stir the mixture until it’s fully incorporated.
Tips for Smooth Batter and Avoiding Overmixing
Achieving a smooth, airy batter is key to a light, fluffy kefir sheet cake. However, it’s equally important to avoid overmixing the batter, as this can lead to a tough cake. Here are some tips for getting it just right:
- Use Room Temperature Ingredients
One of the best tips for achieving a smooth batter is ensuring all your wet ingredients are at room temperature before you begin mixing. Cold ingredients, especially eggs, butter, and kefir, can cause the batter to become lumpy. Let them sit out for 10-15 minutes before you begin, or warm them slightly in the microwave (in short bursts) if needed. - Mix Until Just Combined
When you combine the wet and dry ingredients, stop mixing as soon as everything is incorporated. The batter should be smooth, with no streaks of flour or dry clumps. If you mix too long, you activate the gluten in the flour, which can make the cake dense. - Avoid Over-Stirring
Stirring the batter too much can result in a tough cake. Once the wet and dry ingredients are combined, there’s no need to continue stirring vigorously. Gently fold the ingredients until everything is just mixed. This will give you a soft, fluffy texture in the finished cake. - Use a Spatula or Wooden Spoon
For best results, mix the batter using a spatula or wooden spoon rather than a whisk. A whisk can incorporate too much air, and it can also be hard to mix thoroughly without overworking the batter. A spatula helps you gently fold the ingredients together without overmixing. - Don’t Overfill the Pan
After mixing the batter, pour it into the prepared baking pan. Leave about 1 to 1.5 inches from the top of the pan to allow room for the cake to rise while baking. Overfilling the pan can cause the batter to overflow, which could result in uneven baking or a messy oven. - Check the Texture
As mentioned earlier, check the batter’s texture before you begin baking. If it’s too thick, add a tablespoon of milk or kefir at a time until it reaches the desired consistency. If it’s too thin, sprinkle in a little flour. Just remember not to overwork the batter—gently fold in any additional flour or liquid until the batter is smooth.
By following these tips, you’ll be able to create a perfectly smooth batter that will bake into a light, fluffy, and moist kefir sheet cake. Mixing the batter correctly is the key to achieving a cake that has the right texture and structure, so take your time and enjoy the process!
Optional Add-ins and Variations to Enhance Your Kefir Cake
Now that your batter is ready, it’s time to move on to the baking process. The key to a perfect kefir sheet cake is setting the right baking temperature, allowing enough time for the cake to cook thoroughly, and knowing when the cake is done. Proper baking ensures your cake turns out moist, fluffy, and evenly baked. Let’s break down the steps for baking your cake and testing for doneness.
Baking Temperature and Time
Baking time and temperature are critical factors in achieving the ideal texture and flavor for your kefir sheet cake. Here’s how to get them right:
- Preheat the Oven Properly
Always make sure your oven is fully preheated to the right temperature before putting your cake in. This allows the cake to rise and cook evenly from the start. For most sheet cakes, including kefir-based cakes, a typical baking temperature is 350°F (175°C). This is an ideal temperature for ensuring the cake cooks through without burning the top or bottom. - Bake at the Right Temperature
When the oven is preheated, carefully place your cake pan on the middle rack of the oven. The middle rack ensures that the heat circulates evenly around the cake, preventing uneven baking. Avoid placing the pan too high or too low in the oven, as this can lead to uneven cooking, where the cake might cook too quickly on the edges but remain raw in the center. - Set the Timer
The typical baking time for a kefir sheet cake in a 9×13-inch pan is 25 to 30 minutes. However, baking times can vary slightly depending on your oven and the size of the pan. It’s always a good idea to check your cake a few minutes before the timer goes off to avoid overbaking. If you are using a different pan size, such as a smaller square or rectangular pan, the baking time may be slightly shorter, so monitor closely. - Check for Even Heat Distribution
Ovens can sometimes have hot spots, meaning certain areas of the oven cook food faster than others. If you suspect this, rotate the cake halfway through the baking process (at the 15-minute mark) to ensure even baking.
How to Test If the Cake is Done Using a Toothpick or Cake Tester
Knowing exactly when your cake is done is essential for achieving the perfect texture. If you take the cake out too early, it may be undercooked, and if you leave it in too long, it can dry out. Here are the most reliable methods for testing your cake’s doneness:
- The Toothpick or Cake Tester Method
This is the most common and reliable method for checking the doneness of a cake. Here’s how to do it:- Insert a Toothpick: Take a clean toothpick or cake tester and insert it into the center of the cake, making sure to go deep enough to test the center where the cake takes the longest to cook.
- Check the Results:
- If the toothpick comes out clean or with just a few moist crumbs attached, the cake is done.
- If the toothpick comes out with wet batter on it, the cake needs more time to bake. Place the cake back in the oven and check again every 2-3 minutes.
- Touch Test
In addition to the toothpick method, you can also test the cake by lightly pressing the surface of the cake with your finger. A perfectly baked cake should spring back slightly when pressed gently. If the cake sinks back in and doesn’t bounce back, it likely needs more time in the oven.- Visual Cues: Look for a slightly golden color on the top of the cake. The edges should begin to pull away from the sides of the pan, which indicates the cake has baked through.
- The Toothpick Trick for Large Cakes
If you’re baking a large or thick sheet cake, sometimes the edges may cook faster than the center. In this case, you can check the edges by gently pulling the cake away from the pan. If it’s coming away clean, but the center still has batter on the toothpick, you may want to cover the cake loosely with foil and continue baking for an additional 5-10 minutes. - Bake Times for Different Cake Sizes
Remember that cake size and thickness will affect bake times. A thinner sheet cake will bake faster, while a thicker cake may take longer to bake through. For thinner cakes, check for doneness closer to the 20-minute mark, while thicker cakes may need up to 35 minutes.
What to Do If Your Cake Isn’t Done Yet?
Sometimes, even with the best preparation and timing, the cake might not be done when you check it. If your cake tester or toothpick comes out with wet batter, don’t panic. Simply:
- Put It Back in the Oven: If the cake is underdone, return it to the oven for another 5-10 minutes. Keep the oven door closed as much as possible to avoid letting heat escape.
- Cover with Foil: If the cake is browning too quickly on top but still raw inside, you can loosely cover it with aluminum foil. This will prevent overbaking the top while allowing the rest of the cake to finish baking.
Cooling the Cake
Once the cake passes the toothpick test, it’s important to let it cool properly. Here’s how:
- Remove from Oven: Carefully remove the cake from the oven using oven mitts. Place it on a wire rack to cool.
- Allow to Cool in the Pan for 10 Minutes: Let the cake cool in the pan for about 10 minutes. This allows it to firm up a bit, making it easier to remove from the pan.
- Turn Out the Cake: After the initial 10-minute cooling, gently turn the cake out onto the wire rack to cool completely. If you lined the pan with parchment paper, this will be easy, and the cake will slide right out.
Final Notes on Baking
Baking times can vary, but with the right temperature and a careful eye, your kefir sheet cake will come out just right. Remember that it’s better to check the cake a little earlier than too late, as overbaking can cause the cake to dry out. By testing with a toothpick, watching for visual cues, and paying attention to the texture, you’ll know exactly when your cake is ready to come out of the oven.
Enjoy the anticipation—your kefir sheet cake is now nearly ready to enjoy!

Tips for a Moist and Fluffy Kefir Sheet Cake
Achieving the Perfect Texture in Your Kefir Cake
One of the keys to baking a successful kefir sheet cake is achieving the perfect texture. The cake should be light, fluffy, and moist without being dense or heavy. The texture depends on various factors, but one of the most important is how you mix and fold the ingredients. Overmixing the batter can lead to tough, rubbery cakes, while improper folding can result in uneven texture. Let’s explore why you should avoid overmixing and how to fold ingredients properly for the ideal cake texture.
Why Not Overmix?
Overmixing the cake batter can have a detrimental effect on the final result. When you overmix, the gluten in the flour becomes activated, which leads to a tougher texture. Gluten is a protein found in flour that, when mixed too much, forms a network that makes the cake denser and chewier. This is not what you want in a light and fluffy sheet cake.
- Overmixing Causes Toughness
The key to a light, fluffy cake lies in minimizing the activation of gluten. The more you mix, the more gluten develops, and the tougher the cake becomes. While some gluten formation is necessary for structure, excessive mixing results in a dense, chewy cake that lacks the light, airy quality you’re aiming for. - Mix Until Just Combined
Once you combine your wet and dry ingredients, mix until the batter is just combined. It’s okay if there are a few lumps remaining—don’t be tempted to mix further. If you continue to stir after the batter has come together, the cake will lose its tenderness. You want the dry ingredients to be evenly incorporated without overworking the batter. - How Much Mixing is Too Much?
If you notice flour streaks or clumps remaining in the batter, give it a few more gentle folds to incorporate the dry ingredients. However, if the batter is smooth with no pockets of flour, stop mixing immediately. Think of it as the “just right” amount of mixing—not too little, not too much.
How to Fold Ingredients Properly
Folding is a gentle technique used to combine ingredients without overmixing. It’s ideal for incorporating delicate ingredients like whipped cream, egg whites, or, in this case, kefir, into a batter. Here’s how to fold the ingredients properly to ensure the best texture for your kefir sheet cake.
- Use the Right Tools
The best tool for folding is a spatula or wooden spoon. A whisk or hand mixer can overwork the batter, while a spatula gives you the control you need for gentle folding. The flexible edge of a spatula makes it perfect for scraping the sides and bottom of the bowl to ensure the ingredients are incorporated evenly. - The Folding Motion
To fold properly, place the spatula into the batter at one side of the bowl. Gently lift the mixture from the bottom and fold it over the top. Rotate the bowl as you fold, making sure to scrape the sides and incorporate the batter without stirring or beating. Repeat this motion until all the ingredients are just combined. - Avoid Stirring or Beating
Stirring or beating the batter is a fast and forceful motion that can cause the cake to become dense. When folding, take your time and be patient—there’s no rush. The goal is to incorporate ingredients in a way that maintains the airiness and lightness of the batter. - Gently Fold in Add-ins
If you’re adding optional ingredients like nuts, berries, or chocolate chips, make sure to fold them in at the end, after the wet and dry ingredients are fully combined. Sprinkle them over the surface of the batter and gently fold them in with a spatula. Be careful not to crush delicate ingredients like berries—treat them as gently as possible to preserve their shape and avoid releasing too much moisture into the batter.
How to Incorporate Air for Fluffiness
One of the main goals when folding the batter is to ensure you don’t lose the air that was incorporated into the mixture. This air is essential for the cake’s fluffiness. Here’s how you can ensure your cake rises beautifully and has that melt-in-your-mouth texture:
- Whisking Eggs Separately
For a light, airy texture, some recipes call for whisking the eggs separately before adding them to the wet ingredients. Whisking the eggs will incorporate air into them, helping to create a lighter cake. This is particularly useful in recipes like sponge cakes but can be a helpful tip in sheet cakes as well. - Sifting Dry Ingredients
Sifting the dry ingredients, particularly the flour, not only helps remove clumps but also aerates the flour. This means that when it’s incorporated into the wet ingredients, the batter will have more volume and lightness. Avoid skipping this step—it makes a noticeable difference in the texture. - Don’t Overwork the Batter After Adding the Wet Ingredients
After adding your wet ingredients to the dry mixture, the batter may appear thick. Resist the temptation to overmix or beat it to smooth out lumps. Simply fold the ingredients together until they are incorporated, and leave a little bit of texture if necessary. The key is to retain air in the batter, which helps the cake rise and bake up light.
Signs of Properly Mixed Batter
So, how do you know if you’ve achieved the perfect consistency? Here are a few signs to look out for:
- Smooth and Slightly Thick
The batter should be thick enough to hold its shape but smooth enough to spread easily in the pan. If it’s too runny, your cake may lack structure. If it’s too thick, it may bake unevenly. It should drop slowly from a spoon and hold its shape, but still spread easily in the pan. - No Lumps
The batter should be free of any large lumps or pockets of dry ingredients. A few small lumps are acceptable, as long as the majority of the ingredients are combined. - Airy and Light
After folding, the batter should feel light and airy, not dense or heavy. You should notice some bubbles in the batter as it holds air, which will contribute to the fluffiness of the cake once baked.
Final Tips for the Perfect Cake Texture
- Don’t Rush: Take your time to gently fold the batter without rushing. Rushing through this step can lead to overmixing or uneven incorporation, which affects the texture.
- Use Room Temperature Ingredients: Ingredients that are too cold, such as butter or eggs, can cause the batter to be too thick and difficult to mix. Allow your ingredients to come to room temperature before starting.
- Avoid Overfilling the Pan: Overfilling the pan can affect how the cake rises and cooks. Leave about 1-1.5 inches of space between the batter and the top of the pan for proper expansion.
By paying close attention to the mixing and folding techniques, you’ll achieve the perfect texture for your kefir sheet cake. The result will be a moist, light, and fluffy cake that’s sure to impress!
Avoiding Common Baking Mistakes in Kefir Cake
Baking a kefir sheet cake might seem straightforward, but there are several common mistakes that can affect the final result. Whether it’s a dry, dense cake or one that doesn’t rise as expected, certain errors can undermine your hard work. Understanding these mistakes and knowing how to avoid them is essential to achieving the perfect kefir cake. Let’s dive into the most common pitfalls and how to prevent them.
1. Overmixing the Batter
One of the most frequent mistakes when baking a cake is overmixing the batter. As we discussed earlier, overmixing can activate too much gluten, resulting in a tough, dense texture. When the batter becomes overworked, the cake loses its lightness and can become chewy.
How to Avoid It:
- Mix the batter only until the ingredients are just combined. If you still see a few lumps, that’s okay! The key is not to stir too vigorously or for too long.
- Use a spatula or wooden spoon instead of an electric mixer for the final stages of mixing to keep things gentle.
- Always scrape down the sides of the bowl to incorporate any dry ingredients without overworking the mixture.
2. Incorrect Oven Temperature
Baking at the wrong temperature can lead to several issues, from uneven baking to a burnt exterior and raw center. Many ovens have hot spots or may run hotter or cooler than the temperature indicated, leading to inconsistent results.
How to Avoid It:
- Always preheat your oven to the desired temperature before placing the cake in it. This ensures consistent baking from the start.
- Invest in an oven thermometer to verify the accuracy of your oven’s temperature, especially if it’s an older model.
- If you notice the top of the cake is browning too quickly, lower the temperature slightly and cover the top with aluminum foil to prevent burning.
3. Not Using the Right Pan
Choosing the wrong baking pan can impact both the texture and appearance of your cake. If your pan is too small, the batter may overflow, or the cake may not bake evenly. On the other hand, using a pan that is too large can result in a flat cake with a dry texture.
How to Avoid It:
- Use a 9×13-inch pan for the standard sheet cake recipe. This size ensures even cooking and allows the cake to rise properly.
- If you want to make a larger or smaller cake, adjust the baking time accordingly. For example, a larger pan may require slightly less baking time, while a smaller pan may need a bit more time.
- Line the pan with parchment paper or lightly grease it to ensure easy removal after baking. This also prevents the cake from sticking to the edges.
4. Not Measuring Ingredients Accurately
Baking is a science, and precise measurements are crucial for success. Too much flour can result in a dry, crumbly cake, while too much liquid can make the cake overly moist or dense. Even small deviations in ingredient measurements can affect the texture, flavor, and structure of your cake.
How to Avoid It:
- Use a kitchen scale for more accurate measurements, especially for dry ingredients like flour. Scoop flour into your measuring cup, then level it off with a knife to avoid packing too much flour into the cup.
- For liquid ingredients like kefir, use a liquid measuring cup for accurate results.
- Double-check your measurements before adding ingredients to avoid mistakes.
5. Opening the Oven Door Too Soon
It’s tempting to check on your cake frequently while it’s baking, but opening the oven door too early can cause temperature fluctuations. This can result in a deflated or unevenly baked cake. If the batter hasn’t set yet, it may collapse when exposed to the cooler air.
How to Avoid It:
- Wait until the last 10 minutes of baking before checking on the cake. If you need to check the doneness, do it quickly without leaving the oven door open for too long.
- Use the toothpick or cake tester method to check for doneness without disturbing the cake. This will help you avoid unnecessary temperature fluctuations.
6. Overbaking or Underbaking the Cake
Baking for too long can dry out the cake, while underbaking can leave the center raw. Both issues can ruin the texture and flavor of your kefir sheet cake. Finding the perfect balance between baking times is crucial to ensuring a moist and tender cake.
How to Avoid It:
- Stick to the recommended baking time but always check for doneness before the timer goes off. Oven temperatures and pan sizes can vary, so it’s essential to test the cake as it approaches the minimum baking time.
- Use the toothpick or cake tester method to check if the cake is fully cooked in the center. If the toothpick comes out clean or with a few moist crumbs, the cake is ready to be removed from the oven.
7. Not Letting the Cake Cool Properly
Cooling the cake too quickly or in the wrong environment can lead to a soggy or overly dense texture. Proper cooling allows the cake to set and firm up, making it easier to slice and preventing it from falling apart.
How to Avoid It:
- Allow the cake to cool in the pan for about 10 minutes before attempting to remove it. This gives the cake time to firm up and makes it easier to remove from the pan.
- After the initial cooling period, transfer the cake to a wire rack to cool completely. This prevents moisture from collecting at the bottom of the cake, keeping it light and fluffy.
8. Not Adjusting for Dietary Substitutes
If you’re making substitutions for dietary reasons, such as using a gluten-free or vegan alternative, it’s essential to adjust the recipe to ensure the texture remains intact. Certain substitutes, such as almond flour or dairy-free milk, may affect the moisture level and structure of the cake.
How to Avoid It:
- Follow recommended substitution ratios. For example, if using almond flour instead of all-purpose flour, use a combination of almond flour and gluten-free flour to maintain the right texture.
- Experiment with binding agents like xanthan gum for gluten-free cakes, which help provide structure and elasticity.
- When making dairy-free or vegan substitutions, be mindful of the moisture content in ingredients like non-dairy milk or egg replacements, as this can affect the batter consistency.
9. Using Old or Expired Ingredients
Using expired or stale ingredients like baking powder, baking soda, or even kefir can significantly impact the rise and texture of your cake. Old ingredients lose their potency and won’t react as effectively in the batter, leading to a flat or dense cake.
How to Avoid It:
- Check expiration dates on your ingredients, especially baking powder, baking soda, and yeast.
- Store dry ingredients in airtight containers in a cool, dry place to ensure their freshness.
- Always use fresh kefir for the best flavor and texture, and make sure it’s at room temperature when adding it to the batter for smooth mixing.
10. Skipping the Cooling and Frosting Process
If you plan to frost your cake, it’s important to let it cool completely before adding frosting. Adding frosting to a warm cake can cause it to melt, which can lead to a gooey, messy cake that doesn’t hold its shape.
How to Avoid It:
- Let the cake cool completely before frosting to ensure the icing stays intact and doesn’t melt.
- If you’re working with a thick frosting, make sure it’s chilled slightly before applying it to avoid it being too runny.
By being aware of these common mistakes and knowing how to avoid them, you can ensure your kefir sheet cake turns out perfectly every time. Following these tips will help you achieve a moist, fluffy, and flavorful cake that’s sure to impress your guests!
Storing and Serving Your Kefir Cake for Freshness
Once you’ve baked your delicious kefir sheet cake, it’s essential to store it correctly to maintain its freshness and flavor. Storing and serving your cake properly ensures that it stays moist and delicious for as long as possible. Let’s explore how to keep your cake fresh, along with some fantastic ideas for serving it.
1. Storing the Cake for Freshness
Room Temperature Storage
If you plan to enjoy your kefir sheet cake within a few days, you can store it at room temperature. For this, follow these steps:
- Cool Completely: Before storing, allow the cake to cool completely to room temperature. This prevents condensation from forming inside the storage container, which could make the cake soggy.
- Use an Airtight Container: Once cooled, place the cake in an airtight container or wrap it tightly with plastic wrap. This helps prevent the cake from drying out and maintains its softness.
- Shelf Life: At room temperature, the cake will stay fresh for about 2–3 days. Keep it in a cool, dry place, away from direct sunlight or heat.
Refrigeration for Longer Storage
If you want to keep the cake for a longer period, refrigeration is the best option:
- Wrap and Seal: Again, make sure the cake is completely cool before wrapping it. Use plastic wrap or store it in an airtight container to minimize exposure to air, which can cause the cake to dry out.
- Refrigerator Shelf Life: A refrigerated cake can last for about 5–7 days. While refrigeration helps preserve its freshness, it can also slightly affect the cake’s texture, making it a bit denser.
Freezing for Extended Freshness
For long-term storage, freezing is an excellent option:
- Freeze Individual Slices or Whole Cake: If you want to freeze the cake, it’s best to slice it first. Wrap each slice individually in plastic wrap, and then place them in a freezer-safe bag or airtight container. If you prefer to freeze the whole cake, wrap it tightly in plastic wrap and foil before placing it in the freezer.
- Thawing: When you’re ready to enjoy the cake, simply thaw it in the refrigerator overnight or at room temperature for a few hours. Freezing can extend the shelf life of your cake for up to 3 months without compromising its flavor or texture.
2. Suggested Toppings and Serving Ideas
While your kefir sheet cake is delicious on its own, adding toppings and serving it with complementary sides can elevate the flavor and presentation. Here are some creative ways to serve and decorate your cake:
Whipped Cream
A classic topping for cakes, whipped cream adds a light and airy texture that contrasts beautifully with the richness of the cake. You can:
- Whip Your Own Cream: For a more indulgent topping, whip heavy cream with a bit of sugar and vanilla extract to create a fluffy, homemade topping.
- Sweetened or Unsweetened: Depending on your preference, you can opt for sweetened whipped cream or leave it unsweetened for a more balanced flavor.
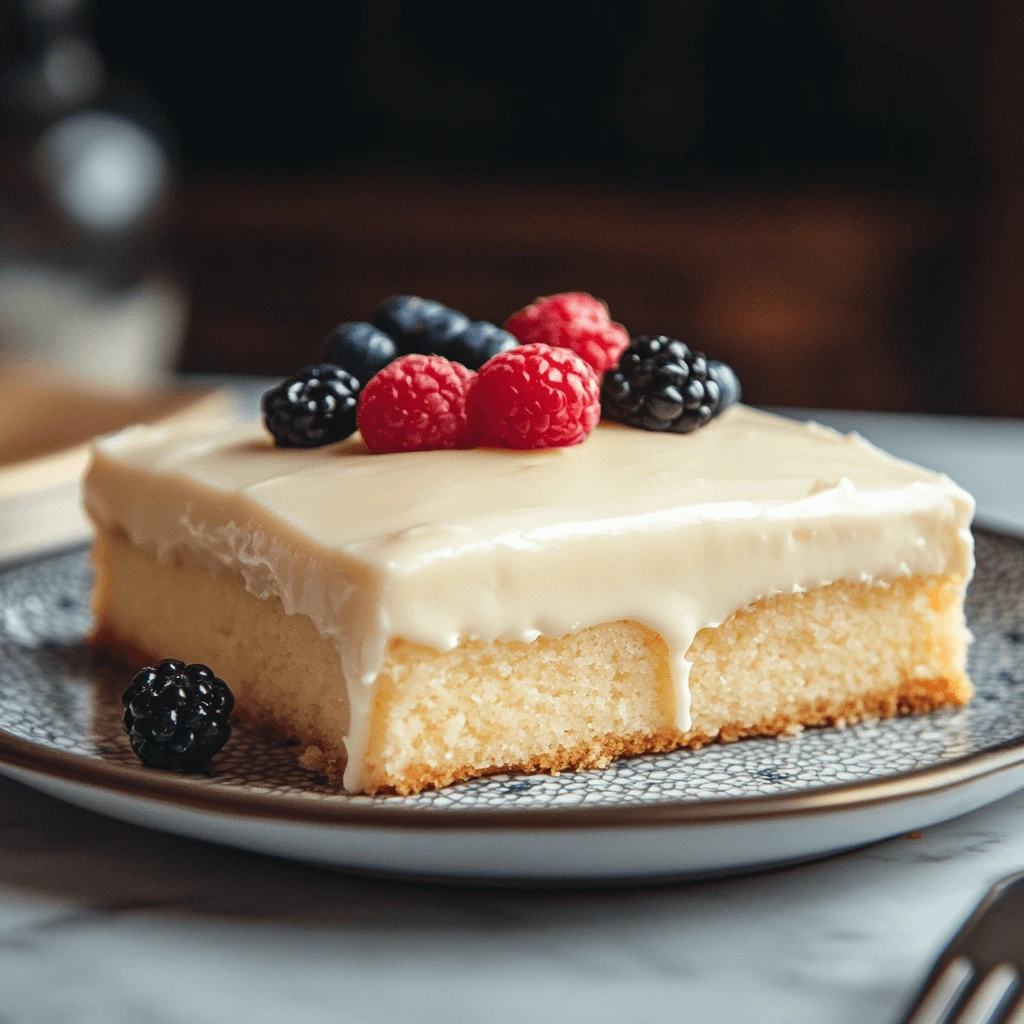
Fresh Fruits
Fresh fruits bring a burst of color and natural sweetness to your cake. Consider pairing the tangy flavor of kefir with fruits like:
- Berries: Strawberries, raspberries, blueberries, and blackberries work well with the tanginess of kefir. Their acidity and sweetness complement the richness of the cake.
- Citrus: A few slices of orange, lemon, or lime can enhance the tangy flavor of the cake and provide a refreshing contrast.
- Stone Fruits: Peaches, plums, or cherries add a juicy, summery flavor to your cake, especially during the warmer months.
Nuts and Seeds
For an extra crunch and a dose of healthy fats, you can sprinkle chopped nuts or seeds on top of your cake. Some great options include:
- Almonds: Sliced or slivered almonds add a nutty flavor and a satisfying crunch.
- Walnuts or Pecans: These nuts bring a rich, earthy flavor that pairs well with the tanginess of kefir.
- Chia or Flax Seeds: For a more health-conscious topping, consider sprinkling some chia or flax seeds on your cake for added texture and nutrition.
Frosting or Glaze
While kefir sheet cake is moist enough to be enjoyed without frosting, adding a simple glaze or light frosting can take it to the next level:
- Cream Cheese Frosting: For a rich and tangy topping, make a cream cheese frosting. Its slight tanginess pairs perfectly with the kefir flavor.
- Lemon Glaze: A light lemon glaze adds a citrusy sweetness to the cake. Mix powdered sugar with a little lemon juice and drizzle it over the top for a beautiful and flavorful finish.
Yogurt or Kefir Cream
For a healthier, probiotic-rich topping, you can use Greek yogurt or kefir cream. This is especially great for those who want to enhance the tangy flavor of the cake while adding a creamy texture.
- Greek Yogurt: A dollop of thick Greek yogurt can bring a creamy element to your cake, enhancing its richness and adding more probiotics.
- Kefir Cream: If you want to stay consistent with the kefir theme, you can make a kefir cream by whipping together kefir with a little honey and vanilla for a slightly sweet, creamy topping.
Drizzle with Honey or Maple Syrup
A drizzle of honey or maple syrup can add a natural sweetness and a glossy finish to your cake. This is especially delicious if you’re serving the cake without frosting, as it enhances the cake’s flavor without overpowering it.
3. Creative Serving Ideas
- Cake with Coffee or Tea: Serve your kefir sheet cake alongside a cup of hot coffee, herbal tea, or chai. The tanginess of the cake balances well with the warm, rich flavors of the beverage.
- Layered Cake: For a more decadent presentation, you can turn your sheet cake into a layered dessert. Cut the cake into layers, add frosting or cream between the layers, and top it off with fruits and nuts for a stunning visual effect.
- Individual Portions: If you’re serving at a party or event, cut the cake into small, individual portions and place them in decorative cupcake liners. This makes it easy for guests to grab and enjoy.
With these storage tips and creative serving ideas, your kefir sheet cake will stay fresh and impress your guests with every bite!
Frequently Asked Questions About Kefir Sheet Cake
Can I Use Store-Bought Kefir for Baking?
When it comes to baking with kefir, many people wonder if store-bought kefir can be used as a substitute for homemade kefir, especially when time is of the essence. While both types of kefir can work well in baking, there are notable differences between homemade and store-bought kefir. These differences can affect the flavor, texture, and probiotic content of your kefir sheet cake, so let’s explore them in more detail.
1. Homemade vs. Store-Bought Kefir: Key Differences
Fermentation Process
The main difference between homemade and store-bought kefir lies in the fermentation process. Homemade kefir is made by fermenting milk with kefir grains—small, living cultures of bacteria and yeast. The fermentation time can vary depending on the temperature and the type of milk used. This process tends to produce kefir with a stronger, more complex flavor profile, and more variety in its probiotic strains.
- Homemade Kefir: The longer you ferment homemade kefir, the more tangy and fizzy it will become, providing a distinctive and vibrant flavor that pairs well with baked goods. The fermentation is natural, giving you a broad spectrum of beneficial probiotics and a flavor profile that can be adjusted based on personal preference.
- Store-Bought Kefir: Commercial kefir, on the other hand, is often produced in a more controlled environment, which can result in a more standardized and predictable product. Most store-bought kefir is pasteurized after fermentation, which helps preserve its shelf life but can reduce the number of active cultures. Some brands might add extra probiotics to compensate, but the flavor is often milder, with fewer variations.
Flavor and Tanginess
Homemade kefir tends to have a more pronounced tangy flavor, which can be both an advantage and a challenge, depending on your preferences. This stronger tang can enhance the flavor of your kefir sheet cake, giving it a unique taste that might not be achievable with store-bought kefir.
- Homemade Kefir: Since you control the fermentation time, you can experiment with different levels of tanginess. The longer the fermentation, the more pronounced the sour notes will be, which can create a deliciously complex flavor in baked goods. This tanginess can balance out the sweetness of the cake, creating a more refined, sophisticated taste.
- Store-Bought Kefir: Commercial kefir tends to have a milder, less tangy flavor, as it is often pasteurized and sometimes sweetened or flavored to appeal to a broader audience. If you prefer a less sour cake, store-bought kefir may be the better option. However, you may miss out on the deeper, more nuanced flavors of homemade kefir.
Texture and Consistency
Texture plays a significant role in how kefir impacts the final result of your cake. Homemade kefir tends to be thicker and creamier, which can add moisture and richness to your cake batter. On the other hand, store-bought kefir can vary significantly in texture, depending on the brand and the type (whole, low-fat, or fat-free).
- Homemade Kefir: Homemade kefir often has a rich, creamy consistency, which can contribute to a denser and moister cake. The thickness of homemade kefir helps bind the ingredients together, creating a smooth and velvety batter. This creaminess adds a comforting richness to the texture of the final cake.
- Store-Bought Kefir: Store-bought kefir, especially the low-fat or fat-free versions, may have a thinner consistency. This might result in a batter that is slightly more runny, which could lead to a lighter, airier cake. If you prefer a fluffier cake, store-bought kefir may suit your needs better, but be sure to adjust other liquid ingredients in your recipe to maintain the right batter consistency.
Probiotic Content and Health Benefits
Kefir is widely known for its health benefits, particularly its high probiotic content, which aids in digestion and supports a healthy gut. However, the probiotic content in store-bought kefir can differ significantly from homemade kefir, primarily due to the pasteurization process.
- Homemade Kefir: Because it’s made with live kefir grains, homemade kefir tends to be richer in live probiotics. The fermentation process naturally produces a wider variety of beneficial bacteria, which can contribute to better digestion and overall gut health. These probiotics are also responsible for the tangy taste of the kefir, making it an integral part of the cake’s flavor profile.
- Store-Bought Kefir: Commercial kefir is often pasteurized, which means it’s heated to a high temperature to kill harmful bacteria. This also kills off some of the live probiotics. However, many store-bought kefir brands add extra probiotic strains to compensate, so you still get a beneficial dose of probiotics, though it may not be as diverse or potent as homemade kefir. If you’re looking for maximum probiotic benefits, homemade kefir is the superior choice.
2. Can You Substitute Store-Bought Kefir in Your Cake Recipe?
Yes, you can absolutely use store-bought kefir in place of homemade kefir for your kefir sheet cake. While there are some differences, the substitution will still yield a delicious cake. Here are a few tips for making the most out of store-bought kefir in your baking:
- Choose the Right Type: Opt for plain, unsweetened kefir without any added flavors or sugars. Flavored varieties can alter the taste of your cake, especially if they contain fruit or sweeteners. Unsweetened kefir will provide a more balanced flavor profile for your cake.
- Adjust Consistency: If you find that the store-bought kefir is too thin, you can add a bit of extra flour to your recipe to compensate for the additional moisture. If it’s too thick, you may want to add a little more liquid to ensure the batter reaches the right consistency.
- Adjust Sweetness: If your store-bought kefir is sweetened, you might want to reduce the sugar in the cake recipe to balance out the sweetness. Store-bought kefir can sometimes be a bit sweeter than homemade, so make sure to taste and adjust accordingly.
3. Benefits of Using Store-Bought Kefir
While homemade kefir has its advantages, store-bought kefir offers several benefits that can make it a great choice for your baking needs:
- Convenience: Store-bought kefir is readily available in most grocery stores, saving you the time and effort needed to ferment milk at home. It’s a quick and easy way to get the probiotic benefits of kefir without the need to make it yourself.
- Consistency: Store-bought kefir is usually consistent in flavor, texture, and probiotic content. If you’re looking for a more predictable outcome with every batch, store-bought kefir is a reliable option.
- No Special Equipment Required: Making kefir at home requires kefir grains and a bit of know-how. With store-bought kefir, you can skip the equipment and fermenting process entirely.
4. Conclusion: Store-Bought Kefir Can Work in Your Cake
In conclusion, store-bought kefir can absolutely be used in your kefir sheet cake recipe. While it may lack the complexity of homemade kefir, it still provides a creamy, tangy element to the cake. When choosing store-bought kefir, look for plain, unsweetened varieties, and adjust the recipe as needed to account for any differences in flavor and consistency. Whether you opt for homemade or store-bought, kefir is a fantastic ingredient that adds moisture, tang, and probiotic benefits to your cake.
Can I Make Kefir Sheet Cake Dairy-Free?
If you’re looking to make your kefir sheet cake dairy-free, there are several alternatives and substitutions available that can help you achieve a similar texture, flavor, and richness without the use of traditional dairy products. Whether due to dietary restrictions, lactose intolerance, or personal preference, a dairy-free version of this cake can be just as delicious and satisfying. Let’s explore how you can make this cake without using any dairy.
1. Dairy-Free Kefir Alternatives
Kefir is typically made from dairy milk, but for those following a dairy-free diet, plant-based kefir is an excellent substitute. Plant-based kefir is made from plant-based milks such as coconut, almond, oat, or soy, and it contains similar probiotic benefits and the tangy flavor that kefir adds to cakes. Here are some options:
Plant-Based Kefir
Plant-based kefir is available in many grocery stores, and it can be used as a 1:1 substitute for dairy kefir in the recipe. Here are a few options to consider:
- Almond Milk Kefir: Made with almond milk, this type of kefir has a mild, slightly nutty flavor. It’s an excellent choice for cakes because it has a light, creamy texture without overpowering the other flavors.
- Coconut Milk Kefir: If you want to add a bit of tropical flair to your cake, coconut milk kefir is a great option. It has a rich and creamy texture with a subtle coconut flavor that complements the tanginess of kefir beautifully.
- Oat Milk Kefir: Oat milk kefir has a naturally creamy consistency, making it ideal for dairy-free baking. It has a slightly sweet flavor that pairs well with both the tanginess of the kefir and the sweetness of the cake.
- Soy Milk Kefir: Soy milk kefir is another common dairy-free option. It has a rich, creamy texture and a neutral flavor, making it a versatile choice for baking.
Making Your Own Plant-Based Kefir
If you can’t find plant-based kefir in stores, you can easily make your own at home by fermenting your preferred plant-based milk with non-dairy kefir grains. This process is similar to making homemade dairy kefir, but it requires special non-dairy grains. While it takes longer to ferment, homemade plant-based kefir allows you to control the flavor and consistency to your liking.
2. Dairy-Free Milk Substitutes
If you can’t find plant-based kefir or simply prefer to use a non-fermented liquid, you can substitute regular milk with various dairy-free milks. These options won’t provide the same probiotic benefits as kefir, but they will still work well in baking and help achieve a similar texture and consistency.
Almond Milk
Almond milk is a popular dairy-free alternative, and its neutral flavor makes it an easy replacement for cow’s milk in most baking recipes. Use unsweetened almond milk to maintain a balanced flavor in your cake. It has a thinner consistency compared to whole milk but can still add moisture and tenderness to the cake.
Oat Milk
Oat milk is a great choice for dairy-free baking due to its naturally creamy texture and slightly sweet flavor. It has a bit more body than almond milk, which makes it a suitable alternative for kefir in cakes. Oat milk can contribute to a slightly denser texture, but it’s perfect for creating a moist and tender cake.
Coconut Milk
Coconut milk, particularly the canned variety, is thicker and richer than almond and oat milk, giving it a similar consistency to dairy milk. It has a mild coconut flavor that can add a unique twist to your kefir sheet cake. For a lighter texture, opt for the carton version of coconut milk, which is thinner and less rich.
Soy Milk
Soy milk is another versatile dairy-free alternative that closely mimics the consistency of cow’s milk. It has a neutral flavor and works well in most baking recipes. Soy milk can be used as a substitute for kefir, though it doesn’t have the tanginess or probiotic content of kefir.
3. Dairy-Free Eggs Substitutes
In addition to replacing dairy kefir, you’ll also need to find alternatives for eggs if you’re aiming for a completely dairy-free and egg-free cake. Eggs help provide structure, moisture, and richness in cakes, so here are some great egg substitutes for your dairy-free kefir sheet cake:
Flaxseed Meal or Chia Seeds
Flaxseeds and chia seeds are popular egg substitutes in vegan and dairy-free baking. Both of these seeds can be mixed with water to create a gel-like consistency that mimics the binding effect of eggs.
- Flaxseed Egg: To make a flaxseed egg, combine 1 tablespoon of ground flaxseed with 3 tablespoons of water. Let it sit for a few minutes to thicken, and then use it in place of one egg in your recipe.
- Chia Egg: Similar to flaxseed, combine 1 tablespoon of ground chia seeds with 3 tablespoons of water. Allow it to gel and use it as an egg replacement.
Applesauce
Unsweetened applesauce is another excellent egg substitute, especially for cakes. It adds moisture and a subtle sweetness to your kefir sheet cake. Use about 1/4 cup of applesauce to replace one egg.
Banana
Mashed ripe banana works well as an egg substitute in some baking recipes, providing moisture and binding the ingredients together. It also adds a mild sweetness, so be mindful of how it might affect the flavor of your cake. Use 1/4 cup of mashed banana to replace one egg.
Aquafaba
Aquafaba, the liquid from canned chickpeas, is a fantastic egg replacer in many baking recipes, including cakes. When whipped, aquafaba can create a fluffy, light texture in your cake. Use about 3 tablespoons of aquafaba to replace one egg.
4. Dairy-Free Sweeteners and Fats
To complete the dairy-free version of your cake, you’ll also want to ensure that your sweeteners and fats align with your dietary preferences.
Dairy-Free Butter Substitutes
There are several butter alternatives you can use to replace traditional dairy butter. Some great options include:
- Vegan Butter: Most brands of vegan butter are dairy-free and have a similar texture to regular butter. Look for varieties that are free from hydrogenated oils for a healthier option.
- Coconut Oil: Coconut oil works well as a dairy-free butter replacement, adding richness and moisture to your cake. Use solid coconut oil for a similar consistency to butter.
- Olive Oil: For a healthier option, you can use olive oil. While it won’t provide the same flavor as butter, it will add moisture and a slight fruitiness to your cake.
Dairy-Free Sweeteners
Most standard sweeteners like white sugar and brown sugar are naturally dairy-free, but if you’re looking for an alternative to refined sugar, you can opt for:
- Maple Syrup: A natural sweetener that pairs well with the tangy flavor of kefir, maple syrup is an excellent alternative for sugar. Use about 3/4 cup of maple syrup for every cup of sugar.
- Coconut Sugar: Coconut sugar has a mild, caramel-like flavor and works well in dairy-free baking.
- Agave Nectar: Agave nectar is another liquid sweetener that can replace sugar. It’s sweeter than sugar, so use it in smaller quantities.
5. Conclusion: Enjoying a Dairy-Free Kefir Sheet Cake
Making a dairy-free kefir sheet cake is completely doable, and the result is just as delicious as the original. By using plant-based kefir or dairy-free milk alternatives, egg substitutes, and dairy-free fats, you can create a cake that meets your dietary needs without compromising on taste or texture. Whether you choose to make your own plant-based kefir or rely on store-bought versions, your dairy-free kefir sheet cake will be a hit for everyone, regardless of dietary restrictions.
How Can I Customize My Kefir Sheet Cake?
One of the great things about kefir sheet cake is its versatility. The tangy flavor and moist texture of kefir provide a fantastic base that you can customize to suit your taste preferences. Whether you want to enhance the flavor with a few added ingredients or experiment with bold new twists, here are some suggestions for making this cake uniquely yours.
1. Flavor Variations
To take your kefir sheet cake to the next level, you can easily add a variety of flavorings to the batter. These simple additions can make your cake even more exciting and personalized. Here are a few flavor ideas to try:
Vanilla
Vanilla is a classic and comforting addition to almost any cake. Simply add 1-2 teaspoons of pure vanilla extract to the batter to give the cake a warm, sweet aroma. Vanilla complements the tanginess of the kefir and enhances the overall flavor profile, making it a perfect match for almost any frosting or filling.
Lemon Zest
For a fresh and zesty twist, consider adding lemon zest to your cake batter. The bright, citrusy notes will beautifully balance the tang of the kefir and bring a light, refreshing flavor to your cake. Start with 1-2 teaspoons of lemon zest, and adjust according to your taste. You can also add a tablespoon of fresh lemon juice for an extra citrus kick.
Orange Zest
If you love citrus flavors but want something a little different, try using orange zest instead of lemon. The sweet and slightly floral flavor of orange adds depth to the cake without overpowering it. You can also pair orange zest with a bit of orange juice for a more pronounced flavor.
Cinnamon
Adding cinnamon to the batter will give your kefir sheet cake a cozy, warm flavor. Cinnamon pairs well with the tanginess of kefir, creating a balanced taste that’s perfect for fall or winter. Add about 1-2 teaspoons of ground cinnamon, or combine it with other spices like nutmeg or ginger for a more complex flavor profile.
Nutmeg
Nutmeg is another spice that pairs well with cinnamon, offering a warm and slightly sweet flavor. Adding a pinch of nutmeg along with cinnamon can create a comforting, spiced cake that’s perfect for the colder months. Be careful not to add too much, as nutmeg can be quite strong.
Almond Extract
For a nutty flavor without using actual nuts, try adding almond extract to the cake batter. This gives the cake a subtle almond flavor that complements the richness of the kefir. Use about 1/2 teaspoon of almond extract for a delicate nutty undertone.
Coffee or Cocoa Powder
For a deeper, more indulgent flavor, consider adding a little instant coffee powder or unsweetened cocoa powder to the batter. A tablespoon of coffee powder will enhance the flavors of the cake and bring out a rich, almost caramel-like taste. Similarly, a tablespoon of cocoa powder will give your cake a chocolatey depth without needing to add actual chocolate.
2. Adding Fruits and Berries
Another fun way to customize your kefir sheet cake is by incorporating fresh or dried fruits into the batter. Adding fruit can not only boost the flavor but also give your cake extra moisture and texture. Here are a few fruit suggestions to try:
Blueberries
Blueberries are a popular addition to cakes because of their sweet-tart flavor and burst of juiciness. They pair perfectly with kefir, adding a pop of color and a fresh flavor to each bite. Fold in about 1 cup of fresh or frozen blueberries into the batter right before baking. If you use frozen blueberries, try to coat them lightly in flour to prevent them from sinking to the bottom of the cake.
Raspberries
Raspberries provide a slightly tart, berry-forward flavor that contrasts nicely with the creamy kefir. Add about 1 cup of fresh or frozen raspberries to the batter, gently folding them in to prevent breaking them up too much.
Strawberries
Chopped strawberries are another excellent option, adding sweetness and texture. You can either fold in chopped fresh strawberries or use freeze-dried strawberries for a more concentrated strawberry flavor. Make sure to chop the strawberries into bite-sized pieces, so they don’t overpower the batter.
Bananas
For a naturally sweet addition, try adding mashed ripe bananas to the cake. Not only will this increase the moisture of the cake, but the banana’s subtle sweetness also complements the tangy kefir perfectly. Use 1/2 to 1 cup of mashed banana for each batch of cake, depending on how prominent you want the banana flavor to be.
Apples
Chopped apples add a wonderful texture to the cake and a natural sweetness that balances the tang of kefir. Consider using varieties like Granny Smith or Fuji apples for a bit of tartness, or opt for sweeter varieties like Gala for a milder flavor. You can also add a sprinkle of cinnamon or nutmeg to highlight the apples’ flavor.
Dried Fruit
If fresh fruit is not in season, dried fruits like raisins, cranberries, or dried apricots can be a great substitute. They provide concentrated flavor and a chewy texture that contrasts nicely with the soft crumb of the cake. To keep the dried fruit from sinking to the bottom, toss it with a bit of flour before folding it into the batter.
3. Adding Nuts and Seeds
Nuts and seeds add crunch, texture, and flavor to your kefir sheet cake. They can complement the tangy kefir and create a more complex, hearty flavor profile. Here are some popular nuts and seeds to consider:
Chopped Walnuts
Walnuts have a slightly bitter flavor that pairs well with sweet cakes. Their crunchy texture adds an interesting contrast to the softness of the cake, and they can be mixed directly into the batter or sprinkled on top for decoration.
Pecans
Pecans are a bit sweeter and milder than walnuts, making them a great choice for cakes. Chopped pecans will give the cake a rich, buttery flavor and a satisfying crunch. Try toasting them lightly before adding them to the batter for extra flavor.
Almonds
Sliced almonds or chopped whole almonds are another excellent addition. Their subtle nutty flavor enhances the richness of the kefir, and their crispy texture adds a delightful contrast to the cake’s soft crumb.
Chia Seeds
Chia seeds can be sprinkled on top of the cake or mixed into the batter. They add a mild nutty flavor, and when baked, they absorb moisture, making the cake even more moist and tender.
Sunflower Seeds
For a nut-free alternative, sunflower seeds provide a pleasant crunch and mild flavor. They are a great option for those with nut allergies, and their light, savory flavor complements the tanginess of kefir without being overpowering.
4. Frosting and Topping Ideas
Once you’ve decided on the flavor of your kefir sheet cake, consider experimenting with different frosting and topping options to complete the cake. Here are some ideas for frostings and toppings that will complement your cake perfectly:
Cream Cheese Frosting
A classic choice for many cakes, cream cheese frosting offers a rich, tangy finish that pairs beautifully with kefir’s tang. The smooth, creamy texture of the frosting will complement the moist crumb of the cake, and its slight tanginess enhances the overall flavor.
Whipped Cream
If you prefer something lighter, whipped cream is an excellent choice. You can either make homemade whipped cream or use a dairy-free version. Add a little vanilla or almond extract to give the whipped cream extra flavor.
Fruit Toppings
For a fresh and colorful touch, top your cake with fresh fruits like strawberries, raspberries, or blueberries. This not only adds a pop of color but also complements the flavors of the cake.
Nuts and Seeds
For a more rustic look, sprinkle chopped nuts or seeds on top of the frosting or directly on the cake itself. This adds a crunchy texture and extra flavor to each bite.
Conclusion: Make It Your Own
The beauty of kefir sheet cake lies in its versatility. With so many options for flavorings, fruits, nuts, and toppings, you can easily customize the cake to suit your preferences. Whether you opt for a simple vanilla or lemon cake, add some tangy fruit, or top it off with a rich cream cheese frosting, the possibilities are endless. Experiment with different combinations and find your perfect version of this delicious cake!
conclusion
Incorporating kefir into your sheet cake recipe brings a unique twist to traditional baking, offering a moist, fluffy texture with a slight tang that enhances the cake’s sweetness. From its probiotic benefits to its versatility in flavor combinations, kefir is a wonderful ingredient that can elevate your baking game. Whether you’re sticking to the classic recipe or customizing your cake with fruits, spices, or alternative ingredients, the possibilities are endless.
Remember to follow the simple preparation steps, avoid overmixing, and store your cake properly for lasting freshness. Don’t hesitate to experiment with variations and toppings, allowing your creativity to shine through. Whether you’re making it dairy-free, adding a burst of citrus, or topping it with whipped cream and fresh berries, this kefir sheet cake is sure to be a crowd-pleaser.
Now that you have all the tips and tricks, it’s time to bake your own delicious, tangy kefir sheet cake and enjoy the perfect balance of flavor and texture!