Heart-shaped cake ideas have a unique charm that makes them the perfect centerpiece for celebrations filled with love and joy. Whether it’s a romantic Valentine’s Day dinner, an anniversary celebration, or even a wedding, a heart-shaped cake is a delightful way to show your affection and creativity. These cakes are more than just desserts—they are a statement of love and care that speaks louder than words.
But with so many heart-shaped cake ideas to choose from, selecting the right design or flavor can feel overwhelming. Should you go for a classic red velvet cake adorned with cream cheese frosting, or try something unique like a matcha-flavored creation? What about the decorations? Do you stick with traditional buttercream swirls, or opt for something bold, like edible flowers or metallic accents? The beauty of heart-shaped cakes lies in their versatility—they can be as simple or extravagant as you want them to be.
This blog post is here to help you navigate those decisions. We’ll explore ten incredible heart-shaped cake ideas that are sure to sweeten your celebrations and impress your loved ones. From timeless classics like chocolate ganache to innovative designs featuring fondant art, there’s something for everyone. Whether you’re an experienced baker or just starting your baking journey, these ideas will inspire you to create a cake that’s not only delicious but also unforgettable.
And it doesn’t stop at just recipes! You’ll also find tips for baking the perfect heart-shaped cake, creative decorating ideas, and flavor combinations that will elevate your dessert to a whole new level. So grab your baking tools, get inspired, and let’s dive into the wonderful world of heart-shaped cakes. By the end of this post, you’ll have all the inspiration you need to make your next celebration truly special.
Creative Heart-Shaped Cake Designs for Any Occasion

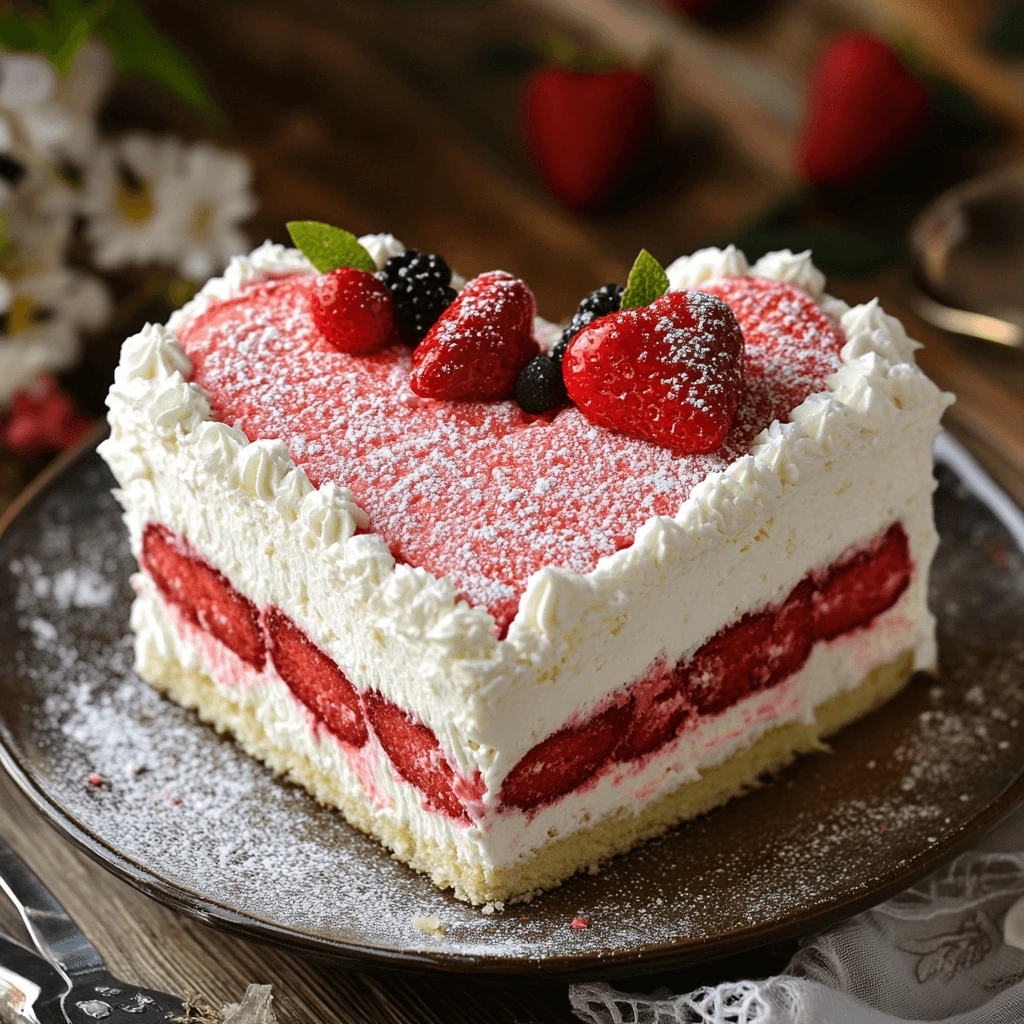
Red Velvet Heart Cake
A Red Velvet Heart Cake is a showstopper that combines elegance and flavor in every bite. Known for its rich, vibrant red color and smooth, velvety texture, this cake is a perfect choice for romantic occasions like Valentine’s Day, anniversaries, or even weddings. The striking contrast of the red cake layers against the creamy white frosting is not only visually appealing but also a delicious treat for anyone with a sweet tooth.
Why Choose Red Velvet?
Red velvet cake is more than just a visually stunning dessert; it’s beloved for its moist, tender crumb and its subtle chocolate flavor. Unlike a typical chocolate cake, red velvet has a mild cocoa taste that doesn’t overpower the other flavors but provides a deep, rich undertone that pairs perfectly with the sweet tang of the cream cheese frosting. This balance of flavors is what makes red velvet cake such a beloved classic.
The signature red color comes from a small amount of red food coloring, which enhances the deep cocoa flavor and gives the cake its dramatic appearance. When served as a heart-shaped cake, the vibrant red hue makes for a romantic and festive presentation that adds an extra layer of charm to your celebration.
Baking the Perfect Red Velvet Cake Base
Creating a tender, moist red velvet cake begins with the right ingredients and techniques. It all starts with a light and airy batter, made with ingredients like buttermilk, oil, and a hint of cocoa powder. The buttermilk is key to achieving the cake’s characteristic tanginess and contributing to its soft texture.
To make the cake base, be sure to follow the measurements carefully and mix the batter gently to avoid overworking the flour. Once the cake layers are baked, allow them to cool completely before frosting. This ensures that the cream cheese frosting doesn’t melt off, resulting in a smooth, even layer of frosting.
Creating the Cream Cheese Frosting
A perfect red velvet cake wouldn’t be complete without its signature cream cheese frosting. The tangy, creamy frosting complements the slightly sweet and cocoa-flavored cake layers, creating a balanced dessert experience. To make the frosting, beat together cream cheese, unsalted butter, powdered sugar, and a touch of vanilla extract. The result is a thick, luscious frosting that can easily be spread or piped onto the cake. For a clean, polished look, apply a crumb coat first (a thin layer of frosting that seals in any crumbs) and chill the cake before adding a final layer of frosting.
Decoration Ideas for Red Velvet Heart Cake
While the classic cream cheese frosting can be elegantly spread on top and around the sides of the cake, there are endless possibilities for decoration to match your celebration. A simple, beautiful approach is to pipe decorative rosettes or swirls of frosting on the top of the heart-shaped cake. You can also add sprinkles, edible glitter, or even small sugar hearts for an extra dose of charm.
For a romantic touch, adorn the cake with fresh edible flowers, such as roses or violets. These add a pop of color and make the cake look even more luxurious. You could also decorate with chocolate shavings, or place small chocolate-covered strawberries on top for a delicious contrast in both taste and texture.
If you’re looking to make the cake more personalized, consider writing a special message like “Love You” or “Happy Anniversary” on the cake using a piping bag with royal icing or melted chocolate. This thoughtful detail will elevate your cake and make it even more memorable for the person you’re celebrating with.
Perfect for Every Occasion
A Red Velvet Heart Cake is ideal for any occasion where love is in the air. Its rich color and luxurious flavor make it perfect for Valentine’s Day or anniversaries, but it’s also a fantastic option for birthdays, weddings, or even a “just because” treat for yourself or a loved one. Its combination of beauty and taste will leave a lasting impression on anyone who gets a slice.
Whether you’re an expert baker or a beginner, this cake’s bold color and indulgent flavor are sure to win hearts at your next celebration. The heart shape not only adds a personal, romantic touch, but it also makes the cake an excellent centerpiece for your table.
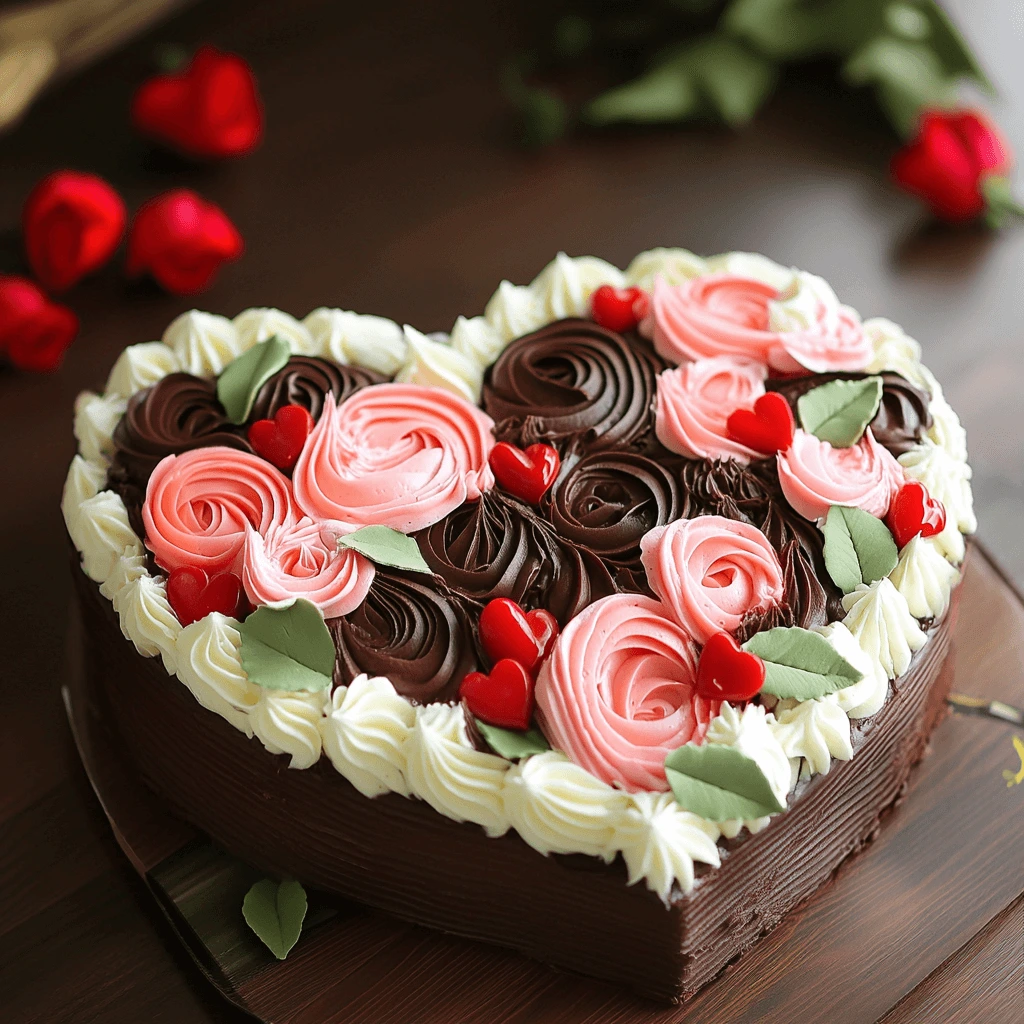
Chocolate Ganache Heart Cake
A Chocolate Ganache Heart Cake is the ultimate indulgence for anyone who loves rich, velvety chocolate. With its luxurious layers of moist cake and glossy ganache, this dessert makes a bold statement at any celebration, particularly for romantic occasions like Valentine’s Day, anniversaries, or even as a decadent birthday treat. The allure of the cake lies not just in its stunning appearance but also in the deep, rich flavor that will leave your taste buds craving more.
Why Choose Chocolate Ganache?
Ganache is a sophisticated yet simple topping that elevates any cake, and when used on a heart-shaped cake, it transforms the dessert into an elegant and decadent creation. Made by combining high-quality chocolate and heavy cream, ganache creates a smooth, velvety texture that’s perfect for draping over cakes. Unlike a typical buttercream frosting, ganache offers a shinier, more luxurious finish that makes your cake look like it came straight from a professional bakery.
The beauty of ganache lies in its versatility—it can be used as a glossy glaze that coats the cake or as a thicker filling for multi-layer cakes. Its rich, bittersweet flavor is a perfect pairing for both chocolate and non-chocolate cakes, offering a depth that balances the sweetness of the cake layers.
Baking the Perfect Cake Base
To complement the chocolate ganache, the base cake should be moist, tender, and rich enough to match the ganache’s luxurious texture. You can use a simple chocolate cake recipe or a more decadent flourless chocolate cake if you’re aiming for a dense, fudgy texture. The key is to create a cake that will hold the weight of the ganache without becoming soggy.
If you’re using a traditional chocolate cake recipe, make sure to sift the dry ingredients to avoid lumps and ensure even mixing. Adding buttermilk or sour cream to the batter will help keep the cake moist. Once baked, allow the cake to cool completely before applying the ganache, as a warm cake can cause the ganache to melt too quickly and lose its glossy finish.
Creating the Ganache Glaze
Making the perfect ganache is simple and requires just two main ingredients: good-quality chocolate and heavy cream. You can use dark chocolate for a more intense flavor or milk chocolate for a sweeter, smoother taste. Here’s how to prepare it:
- Chop the chocolate into small, even pieces for quick melting.
- Heat the cream in a saucepan until it just starts to simmer (avoid boiling).
- Pour the hot cream over the chopped chocolate and let it sit for a minute to soften the chocolate.
- Stir the mixture until it becomes smooth and glossy. The ganache should have a thick but pourable consistency.
At this point, you can adjust the texture of the ganache by allowing it to cool for a few minutes. If you want a thinner ganache that will drizzle over the edges of the cake, use it immediately. For a thicker ganache that you can spread or pipe, let it cool slightly or refrigerate it for a few minutes.
Decorating the Chocolate Ganache Heart Cake
Once your ganache is ready, it’s time to decorate your heart-shaped cake. The glossy ganache creates a stunning finish on its own, but there are many ways to take your cake to the next level with additional decorative touches.
- Fresh Berries: Garnish the cake with fresh strawberries, raspberries, or blackberries to add a burst of color and a fresh contrast to the richness of the ganache.
- Chocolate Shavings: For an extra layer of chocolate goodness, sprinkle chocolate shavings over the ganache. This can be done using a vegetable peeler or grater to create delicate curls or flakes.
- Edible Flowers: To bring elegance and natural beauty to your cake, add edible flowers like violets, roses, or pansies. These flowers pair beautifully with chocolate, adding color and a delicate touch to the overall presentation.
- Whipped Cream: Lighten up the rich chocolate ganache with dollops of freshly whipped cream around the edges of the cake for a creamy contrast.
- Gold Leaf or Edible Glitter: For a truly luxurious touch, sprinkle some edible gold leaf or glitter over the ganache. This can elevate your cake and make it feel like an extravagant masterpiece.
- Nuts or Caramel: If you want to add texture, consider sprinkling chopped toasted nuts, like hazelnuts or almonds, or drizzling some salted caramel sauce on top for an extra flavor boost.
Perfect for Every Occasion
A Chocolate Ganache Heart Cake is perfect for any celebration where you want to impress and delight your guests. The rich flavor and elegant appearance make it especially fitting for romantic occasions such as Valentine’s Day, anniversaries, and weddings. It also makes for an extraordinary birthday cake, particularly for those who appreciate the sophistication of dark chocolate.
Not only is this cake delicious, but it’s also visually stunning. The glossy ganache and simple heart shape provide a striking contrast, making it an ideal centerpiece for any special event. Whether you’re celebrating with family, friends, or a special someone, this cake is sure to leave a lasting impression and add a touch of indulgence to the occasion
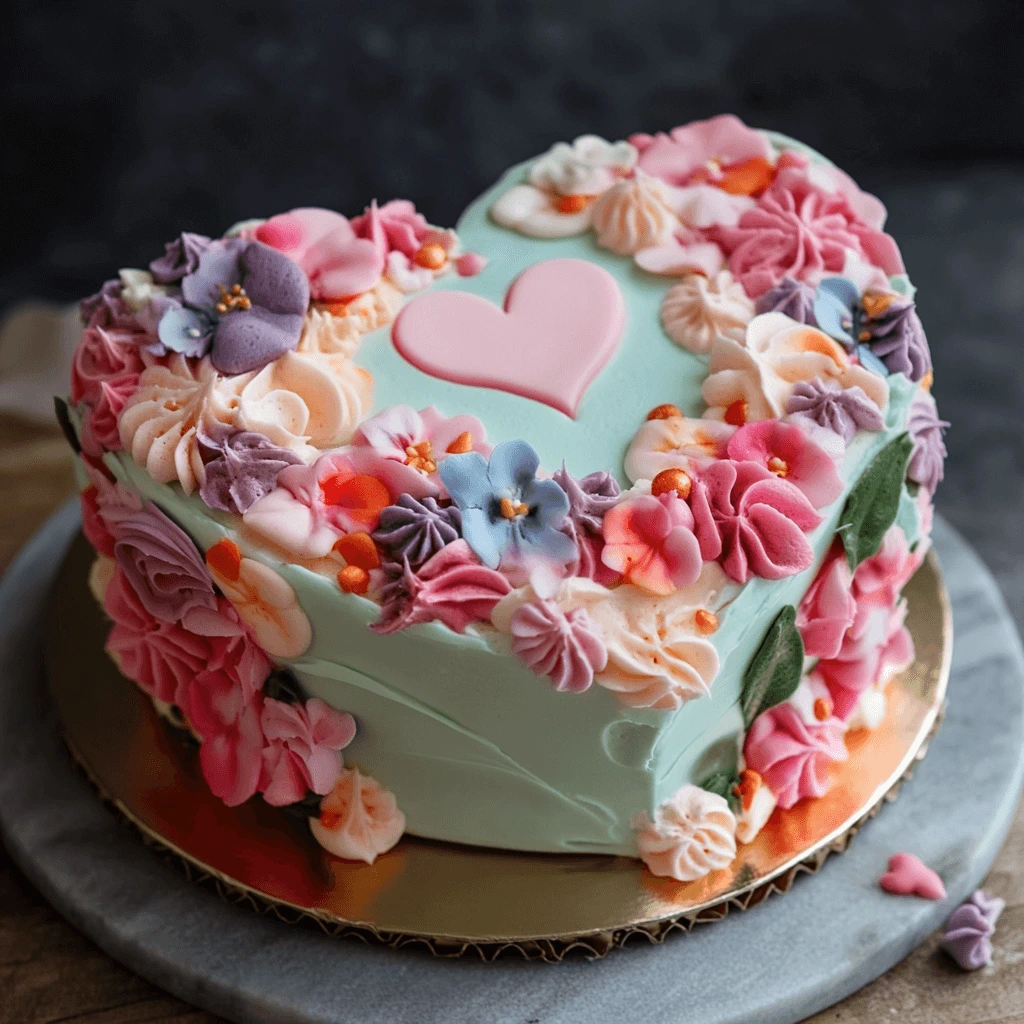
Elegant Fondant Heart Cakes
When it comes to creating an elegant, visually striking cake, fondant is the go-to choice for many bakers. Fondant heart cakes not only offer a sleek, smooth finish but also provide endless possibilities for intricate designs, making them a perfect choice for high-end celebrations such as weddings, anniversaries, or milestone birthdays. The clean, polished look of fondant can turn a simple heart-shaped cake into an absolute showstopper, impressing both visually and in taste.
Why Choose Fondant for Heart Cakes?
Fondant is a versatile, pliable icing made from sugar, water, and gelatin, which, when rolled out, creates a smooth, glossy surface that covers cakes seamlessly. Unlike traditional buttercream, which has a more textured finish, fondant gives a flawless, satin-like look that makes it perfect for elegant occasions. Its smooth texture is ideal for creating sharp edges and intricate decorations, while its mild sweetness balances out richer cake flavors.
One of the biggest advantages of using fondant for heart-shaped cakes is that it allows for creative freedom. You can use fondant to create beautiful, sharp-edged designs or sculpt stunning flowers, bows, or lacework, transforming a simple cake into an intricate work of art. Whether you want a minimalistic, chic design or an elaborate, decorated cake, fondant makes it possible.
Baking the Perfect Cake Base for Fondant
To ensure that fondant can be applied smoothly and hold its shape, the cake base must be sturdy and firm enough to support the weight of the fondant layer without sinking or shifting. A dense, moist cake such as a butter cake, pound cake, or even a rich chocolate cake works best as a foundation. These cakes hold up well under the weight of fondant and provide a solid base for intricate designs.
After baking your heart-shaped cake, it’s important to level the top and edges to create a flat surface. This ensures that the fondant will adhere evenly to the cake. Once the cake is cooled and leveled, apply a thin layer of buttercream or jam to act as an adhesive between the cake and the fondant. This layer helps the fondant stick, keeping it smooth and preventing air bubbles from forming beneath the surface.
Rolling and Applying Fondant
When working with fondant, it’s essential to roll it out evenly and thinly to avoid it being too thick, which can create an overly sweet taste and a heavy texture. Use a rolling pin and a dusting of cornstarch or powdered sugar to prevent the fondant from sticking. Roll the fondant to about 1/8-inch thickness, large enough to cover the entire cake with a little excess around the edges.
To apply the fondant:
- Drape the Fondant: Carefully lift the rolled fondant and drape it over the cake, allowing it to cover the entire surface.
- Smooth and Secure: Use a fondant smoother to gently smooth out any wrinkles and air bubbles, working from the top down towards the sides. Trim any excess fondant around the base with a sharp knife or pizza cutter.
- Finishing Touches: Once the fondant is in place, you can add any additional design elements, such as fondant flowers, ribbons, lace, or even hand-painted details to enhance the elegance of your heart-shaped cake.
Creative Fondant Decorations for Heart Cakes
One of the main reasons fondant is favored for elegant cakes is the ability to create highly detailed, intricate designs. Here are some decoration ideas that will elevate your fondant heart cake:
- Fondant Flowers: Whether it’s roses, peonies, or delicate baby’s breath, fondant flowers can be crafted in any color or size to adorn the top or sides of the cake. These edible flowers create a romantic, sophisticated look, perfect for weddings or anniversaries.
- Lace and Ribbons: Fondant can be used to create elegant lace patterns or ribbon designs that wrap around the base of the cake or cascade from the top. This gives the cake a vintage, intricate feel, which is especially popular for bridal or anniversary cakes.
- Gilded Accents: For a luxurious touch, consider adding edible gold leaf or gold dust to your fondant decorations. You can apply gold to flower petals, the edges of the heart, or even as delicate flourishes on the surface of the cake. This will give your cake an opulent, refined finish.
- Personalized Details: Use fondant to create monograms, initials, or names as a personal touch for special celebrations. You can also create themed decorations, such as a heart with a wedding couple’s names or a custom design that matches the event’s theme.
- Shaped Fondant Decorations: Consider creating small fondant figurines such as lovebirds, hearts, or even a fondant bow that can sit atop the cake for added sophistication. These can be as simple or elaborate as you prefer, adding texture and personality to your heart-shaped cake.
Perfect for Special Occasions
Fondant heart cakes are the epitome of elegance and luxury, making them ideal for milestone events and special celebrations. From weddings and anniversaries to birthdays or Valentine’s Day, a fondant-covered heart-shaped cake will always stand out as a beautiful centerpiece. The smooth finish, paired with personalized and intricate decorations, makes this cake a true showstopper that will leave guests in awe.
Not only does fondant offer a pristine finish, but it also holds up beautifully during transport and serving, ensuring that your cake looks flawless from start to finish. Whether you’re a professional baker or a home enthusiast, fondant allows you to craft cakes that are both visually stunning and delicious, giving your heart-shaped creation the wow factor it deserves.
Tips for Baking the Perfect Heart-Shaped Cake
The Right Cake Mold
When baking a heart-shaped cake, choosing the right cake mold is crucial to ensuring that the cake not only looks beautiful but bakes evenly and holds its shape throughout the process. The right mold provides the foundation for a perfect heart-shaped cake, which will serve as the centerpiece for your celebration. Whether you’re creating a simple dessert for a loved one or a more elaborate cake for a special occasion, selecting the proper mold is the first step to achieving a flawless result.
Types of Cake Molds for Heart-Shaped Cakes
There are a variety of heart-shaped cake molds available on the market, and each offers different benefits depending on the design, size, and style of the cake you’re looking to create. Here’s a breakdown of the most popular types of cake molds for heart-shaped cakes:
- Traditional Metal Heart Molds: Metal cake pans, especially those made from aluminum or stainless steel, are popular for their durability and even heat distribution. These molds conduct heat efficiently, ensuring that your cake bakes uniformly. Metal pans are available in a wide range of sizes, allowing you to customize your heart-shaped cake to suit the occasion. When using a metal pan, it’s essential to grease and flour the mold before pouring in the batter to prevent sticking.
- Silicone Heart Molds: Silicone molds have become increasingly popular for their flexibility and ease of use. A major advantage of silicone molds is that they allow for easy release of the cake without the need for additional greasing or flouring. These molds are also highly flexible, which makes it easy to remove the cake once it has cooled. Silicone is great for cakes that require intricate designs or delicate decoration, as it prevents the cake from sticking to the mold and helps preserve the shape.
- Springform Heart Pans: For more delicate or layered cakes, a springform pan can be the best option. This type of pan features a detachable bottom and a latch on the side, which allows you to easily remove the cake from the pan without damaging it. Springform pans are great for heart-shaped cheesecakes or layered cakes where you want a smooth finish and want to avoid the risk of breaking the layers when removing the cake.
- Custom-Shaped or Novelty Heart Molds: If you’re looking for a more unique heart-shaped cake, there are many custom and novelty molds available that feature intricate designs, such as heart-shaped molds with embossed patterns, lace, or even hearts with additional designs like flowers or swirls. These molds add a professional touch to your cake and save you time on decoration, as the mold itself will create stunning details for your cake. For example, a heart-shaped mold with a swirl pattern can add an elegant texture to the cake’s exterior.
Choosing the Right Size Mold
When it comes to choosing the right size mold, it’s important to consider how many people you’re serving and the occasion. Heart-shaped cakes come in various sizes, so here are a few tips to guide your decision:
- Small Heart Molds (6-8 inches): These are perfect for smaller gatherings, such as intimate dinners or a special dessert for two. A smaller heart-shaped cake is ideal for personal celebrations like Valentine’s Day or anniversaries.
- Medium Heart Molds (9-12 inches): Medium-sized heart molds are ideal for small to medium-sized groups, such as family parties, baby showers, or birthdays. A 9-inch heart-shaped cake will serve around 12-15 people, which is typically the right size for a small celebration.
- Large Heart Molds (12 inches and above): Large heart molds are great for big parties or events such as weddings or large birthdays. These molds are perfect if you need a larger cake to feed 20 or more people. Keep in mind that larger molds may require extra baking time to ensure the cake is baked through evenly.
Materials to Look for in the Right Cake Mold
Apart from the shape of the mold, the material is also a key factor in achieving the best results when baking your heart-shaped cake. Consider the following materials and their pros and cons:
- Nonstick Coating: A nonstick coating makes it easy to remove your cake after baking. While these molds are convenient, make sure to follow the manufacturer’s instructions on cleaning and care to prevent damaging the coating.
- Heavy-Gauge Metal: A heavy-gauge metal mold helps distribute heat evenly across the cake, reducing the risk of hot spots and uneven baking. These molds are especially useful for achieving a uniformly baked cake with a golden-brown crust.
- Glass Cake Molds: Glass molds allow you to visually monitor your cake as it bakes, but they may not conduct heat as efficiently as metal molds. If you choose a glass mold, be mindful of the baking time, as it may vary slightly compared to other materials.
Prepping Your Cake Mold
No matter which cake mold you choose, it’s important to properly prepare the mold to ensure your cake doesn’t stick. Here’s a quick guide to preparing your mold:
- Grease and Flour: For metal molds, generously grease the inside with butter or vegetable oil, and dust it with flour to create a nonstick surface. This step is crucial to ensure that the cake comes out of the pan easily.
- Use Parchment Paper: If you’re using a silicone or metal pan, line the bottom of the mold with parchment paper for added security. This prevents any chance of sticking and ensures the cake slides out with ease.
- Chill the Mold: If you’re using a silicone mold, placing it in the refrigerator for a few minutes before pouring in the batter can help it maintain its shape while baking, especially if you’re working with a delicate cake batter.
Final Thoughts on the Right Cake Mold
Choosing the right heart-shaped cake mold is essential to creating a beautiful, well-baked cake. By selecting the appropriate mold based on size, material, and type, you can ensure that your cake comes out of the pan easily, maintains its shape, and is perfectly baked. Whether you opt for a traditional metal mold, a flexible silicone one, or a more intricate springform pan, the right mold will help make your heart-shaped cake the star of your celebration.
Choosing the Right Cake Mold
Choosing the Best Mold for Heart-Shaped Cakes
When baking a heart-shaped cake, choosing the right mold is key to achieving a perfect result. The right mold ensures the cake bakes evenly and holds its shape throughout the process. There are several options to choose from, each offering unique advantages depending on your needs.
Types of Cake Molds
Different cake molds are available, each with distinct features to suit various baking needs:
- Traditional Metal Heart Molds:
Metal pans, such as aluminum or stainless steel, are durable and distribute heat evenly. Grease and flour them before use to prevent sticking. These molds are perfect for creating uniform cakes with a golden finish. - Silicone Heart Molds:
Silicone molds are flexible, making it easier to remove cakes. They don’t require greasing, and they preserve the shape of delicate cakes. However, you should still check the mold for even heat distribution to ensure uniform baking. - Springform Heart Molds:
For layered cakes or cheesecakes, a springform pan is ideal. The detachable bottom makes it easy to remove the cake without damaging it. These molds are excellent for intricate heart-shaped cakes with delicate layers. - Custom-Shaped or Novelty Molds:
Novelty molds often feature intricate designs, such as embossed patterns or decorations. These molds add a professional touch to your heart-shaped cake, saving time on decorations.
Selecting the Right Size Mold
The size of the cake mold depends on how many people you need to serve. Here’s a quick guide to selecting the right mold size:
- Small (6-8 inches): Great for intimate celebrations like Valentine’s Day or anniversaries.
- Medium (9-12 inches): Ideal for small gatherings, such as family birthdays or baby showers.
- Large (12 inches and above): Perfect for big events like weddings or large birthday parties.
Materials to Consider
Different materials can affect how your heart-shaped cake bakes. Here are the common options:
- Nonstick Coating:
Nonstick pans make it easy to release the cake. Be sure to follow the manufacturer’s care instructions to protect the coating. - Heavy-Gauge Metal:
Heavy-gauge metal distributes heat evenly, ensuring a uniform bake. These molds are excellent for dense cakes. - Glass Molds:
Glass pans allow you to monitor the baking process. However, they don’t distribute heat as evenly as metal pans.
How to Prepare Your Cake Mold
Properly preparing the mold ensures your cake doesn’t stick. Here’s how:
- Grease and Flour:
For metal pans, grease with butter or oil, then dust with flour to prevent sticking. - Use Parchment Paper:
Line the bottom of the pan with parchment paper for an extra layer of protection. - Chill Silicone Molds:
Before pouring in the batter, chill silicone molds for a few minutes. This helps maintain the shape while baking.
Final Thoughts on Choosing the Right Cake Mold
Choosing the best cake mold for your heart-shaped cake is essential. Whether you opt for a traditional metal pan, a flexible silicone mold, or a springform pan, the right mold will help your cake bake evenly, maintain its shape, and come out beautifully. Follow the tips above to ensure that your heart-shaped cake is a success!
Choosing the Best Mold for Heart-Shaped Cakes
Choosing the right mold is key to a perfect heart-shaped cake. It helps the cake bake evenly and hold its shape. Several options are available, each offering different benefits.
Types of Cake Molds
Here are some of the most popular heart-shaped cake molds:
- Traditional Metal Heart Molds:
Metal pans, like aluminum or stainless steel, are durable and bake cakes evenly. Grease and flour them to prevent sticking. These molds create uniform cakes with a golden crust. - Silicone Heart Molds:
Silicone molds are flexible and non-stick. They make it easier to remove cakes without damage. However, check the mold for even heat distribution to ensure uniform baking. - Springform Heart Molds:
A springform pan is perfect for layered cakes. The detachable bottom makes it easy to remove the cake. It’s ideal for delicate heart-shaped cakes. - Custom or Novelty Molds:
These molds often have intricate designs. They save you time on decoration and add a professional touch.
Selecting the Right Size Mold
Choosing the right size is essential for the number of servings you need. Here’s a guide:
- Small (6-8 inches): Great for intimate gatherings like Valentine’s Day.
- Medium (9-12 inches): Ideal for family parties or baby showers.
- Large (12 inches and above): Perfect for weddings or large birthday parties.
Materials to Consider
Different materials affect how your cake bakes. Here are some common options:
- Nonstick Coating:
Nonstick pans make it easy to release the cake. Be sure to follow care instructions to avoid damage. - Heavy-Gauge Metal:
Metal pans heat evenly and create a uniform bake. These are excellent for dense cakes. - Glass Molds:
Glass pans let you see the baking process. However, they don’t heat as evenly as metal pans.
How to Prepare Your Cake Mold
Preparing your mold properly ensures the cake doesn’t stick. Here’s how:
- Grease and Flour:
Grease the pan with butter or oil, then dust with flour to prevent sticking. - Use Parchment Paper:
Line the bottom with parchment paper for extra protection. - Chill Silicone Molds:
Chill silicone molds before adding batter. This helps maintain the shape while baking.
Baking the Perfect Sponge
Baking a heart-shaped cake begins with creating the perfect sponge. A sponge cake is light, airy, and has a fine crumb, making it the ideal base for heart-shaped cakes. It’s versatile, allowing you to layer with different fillings and frostings. However, achieving the perfect sponge requires attention to detail. The key is to balance the ingredients, master the mixing technique, and pay close attention to the baking time.
Choosing the Right Ingredients
To bake a perfect sponge, start with high-quality ingredients:
- Flour:
Use cake flour for a light, tender texture. Cake flour has a lower protein content than all-purpose flour, helping to create a soft, fluffy sponge. If cake flour isn’t available, you can substitute it with all-purpose flour, but the result may be slightly denser. - Eggs:
Eggs are a critical component of a sponge cake. They help provide structure and volume. Make sure to use room temperature eggs for the best results. Cold eggs may cause the batter to curdle or not rise as effectively. - Sugar:
Use caster sugar (or superfine sugar) for a smooth batter. Granulated sugar may not dissolve as well and could leave a grainy texture. The sugar also plays a role in aerating the cake when beaten with eggs. - Butter:
While some sponge cake recipes call for butter, others do not. A butter-free sponge will typically be lighter, but if you prefer a richer taste, go for a light butter (or a combination of butter and oil). Remember to melt it and allow it to cool before adding to the batter.
The Mixing Technique
The mixing method is one of the most crucial steps in baking the perfect sponge. It directly affects the texture and rise of your cake. Here are a few tips:
- Whisking the Eggs and Sugar:
Start by whisking the eggs and sugar together until they become thick and pale. This process, known as aerating, helps incorporate air into the mixture, which will give the cake its light, fluffy texture. Ideally, you should whisk for 5-10 minutes on high speed. If you use a hand whisk, be prepared to whisk for a longer period. - Folding in the Flour:
After whisking the eggs and sugar, it’s time to gently fold in the flour. Be careful not to deflate the air bubbles you’ve incorporated. Use a large spatula and fold in the flour slowly and methodically. If you overmix, the sponge will become dense and heavy. - Incorporating Butter (if using):
If your recipe includes butter, gently fold it into the batter after the flour. Make sure the butter is fully incorporated but be careful not to overwork the mixture. Overmixing the batter after adding the butter can lead to a dense texture.
Baking the Sponge Cake
Once your batter is ready, it’s time to bake. Follow these tips for a flawless sponge:
- Preheat the Oven:
Always preheat your oven to the correct temperature before placing your sponge in. For a sponge cake, the temperature is typically around 325°F (165°C). A consistent, even temperature is essential for even baking and a uniform rise. - Prepare the Cake Pan:
Use a heart-shaped cake pan, and grease it thoroughly. You can line the bottom of the pan with parchment paper to prevent sticking. For extra security, lightly flour the sides of the pan. - Bake in the Center of the Oven:
Position your cake in the center of the oven, as this allows for the most even heat distribution. Avoid opening the oven door during the first 15-20 minutes of baking to prevent the sponge from collapsing. - Baking Time:
Bake your sponge for 20-30 minutes, depending on the size and thickness of the cake. A good test is to insert a toothpick into the center. If it comes out clean or with only a few crumbs, the sponge is ready.
Post-Baking Tips
- Cooling:
Once the cake is done, allow it to cool in the pan for 10 minutes. Then, turn the cake out onto a wire rack to cool completely. This helps prevent the sponge from becoming soggy. - Avoid Overbaking:
Overbaking can lead to a dry, crumbly sponge. Be sure to keep an eye on the cake during the final few minutes of baking. You may also want to slightly underbake it, as the residual heat from the pan will continue cooking the cake after you remove it from the oven. - Storing:
If you’re not using the sponge cake immediately, you can wrap it in plastic wrap once it has cooled completely and store it at room temperature for up to 2 days. You can also freeze it for longer storage, but be sure to wrap it tightly to prevent freezer burn.
Troubleshooting Common Issues
If you’re new to sponge cakes, here are some common issues and their solutions:
- Cake Won’t Rise: This could be due to under-whisking the eggs or not folding in the flour gently. Ensure that you aerate the eggs and sugar properly and fold in the flour carefully.
- Dense Texture: Overmixing the batter can lead to a dense sponge. Always fold gently and avoid overworking the batter once the flour is added.
- Cake Shrinks After Baking: This can happen if the oven temperature is too high or if the cake is removed from the oven too soon. Make sure your oven temperature is correct and don’t open the door during the first stages of baking.
Final Thoughts on Baking the Perfect Sponge
Baking a perfect sponge cake requires patience, precision, and practice. By selecting the right ingredients, following the proper mixing technique, and keeping a close eye on the baking process, you’ll create a light and fluffy sponge every time. This foundation will provide the perfect canvas for decorating your heart-shaped cake, whether you’re adding frosting, filling, or other creative touches.
Common Mistakes When Baking Heart-Shaped Cakes
Baking a heart-shaped cake can be a fun and rewarding experience, but it’s easy to make mistakes that can affect the final result. Whether you’re a seasoned baker or a beginner, understanding common mistakes and how to avoid them can help ensure that your heart-shaped cake turns out perfectly every time. Here are some of the most common mistakes when baking a heart-shaped cake and tips on how to prevent them.
1. Using the Wrong Cake Pan
Choosing the wrong pan can make a significant difference in your cake’s texture and shape. Many bakers use a round or square pan instead of a heart-shaped cake pan when making a heart-shaped cake. While this can work in a pinch, it can lead to uneven layers or misshaped results.
Solution:
Always use a high-quality heart-shaped cake pan to achieve the perfect heart shape. Whether you opt for a traditional metal, silicone, or springform mold, ensure it’s the right size and shape for your recipe. If you don’t have a heart-shaped pan, you can use a round pan and carefully cut the shape out after baking, but this requires extra precision.
2. Overmixing the Batter
Overmixing the batter is a common mistake that can ruin the texture of your cake. When you mix the ingredients for too long, you can deflate the air bubbles in the batter, resulting in a dense and heavy cake. This is especially important when making sponge or chiffon cakes, where the light and fluffy texture is key.
Solution:
Mix the ingredients just enough to combine them. When folding in the flour or other dry ingredients, do so gently. The goal is to preserve the air that’s been incorporated, which gives the cake its airy texture. If you’re using a hand mixer, mix at low speed to avoid overworking the batter.
3. Using Cold Ingredients
Cold ingredients can negatively affect the texture of your heart-shaped cake. Cold butter, eggs, and milk don’t blend as well with other ingredients, leading to uneven mixing and a lumpy batter. This can also impact how the cake rises.
Solution:
Before baking, allow your eggs, butter, and other dairy products to come to room temperature. This ensures even mixing and allows the ingredients to emulsify properly, resulting in a smooth, well-blended batter. Set the ingredients out about 30 minutes before you start baking to bring them to room temperature.
4. Not Properly Preparing the Cake Pan
Not greasing and flouring the cake pan properly can lead to your cake sticking to the sides and bottom. This can make it difficult to remove the cake without damaging its shape, especially with delicate heart-shaped cakes.
Solution:
Always grease your cake pan thoroughly with butter or cooking spray, then dust it lightly with flour. Alternatively, you can line the bottom of the pan with parchment paper to ensure the cake comes out easily. For silicone pans, make sure to lightly chill them before using them to help maintain the shape.
5. Not Preheating the Oven
Baking a cake in an oven that’s not preheated can cause uneven baking. The cake might not rise properly, and the edges could cook faster than the center, resulting in an uneven texture and shape.
Solution:
Always preheat your oven to the required temperature before placing your cake inside. For most cakes, this is typically between 325°F (165°C) and 350°F (175°C). Use an oven thermometer if you’re unsure of your oven’s temperature accuracy, as even slight variations can affect your baking.
6. Overbaking or Undercooking
Overbaking your heart-shaped cake can lead to a dry, crumbly texture, while underbaking can result in a raw center. It’s a fine balance to achieve the perfect bake, and it can be tricky, especially for delicate heart-shaped cakes.
Solution:
Check the cake towards the end of the baking time by inserting a toothpick or cake tester into the center. If it comes out clean or with a few moist crumbs, the cake is done. If the toothpick comes out with wet batter, give it a few more minutes. Always check for doneness based on the specific recipe you’re following.
7. Cutting the Cake While It’s Still Warm
It can be tempting to cut into your freshly baked cake, but cutting it while it’s still warm can result in a messy, squished cake. The cake needs time to set and cool so it can hold its shape and texture.
Solution:
Let your cake cool completely before attempting to cut or frost it. For best results, let it sit in the pan for about 10 minutes, then transfer it to a wire rack to cool for at least 30 minutes before frosting or cutting.
8. Not Allowing the Cake to Rest After Frosting
When you frost a cake and serve it immediately, the frosting may slide off or look uneven, especially if the cake is still warm. This is especially true for richer frostings like ganache, which need time to set.
Solution:
Allow the cake to rest after frosting it for at least 30 minutes to an hour. This gives the frosting time to set and adhere better to the cake. If you need to refrigerate it, cover the cake loosely with plastic wrap to prevent it from drying out.
9. Using the Wrong Frosting for Your Cake Type
Some frostings are too heavy for certain types of cakes. For example, a rich buttercream may overwhelm a light sponge, while a thin frosting might not complement a denser cake.
Solution:
Pair your frosting with the type of cake you’re making. For light, fluffy cakes like sponge or chiffon, choose lighter frostings like whipped cream, meringue, or a glaze. For denser cakes, opt for richer frostings like buttercream, ganache, or cream cheese frosting.
10. Skipping the Cake Testing Process
It’s easy to assume the cake is done without testing it. But skipping the cake test can result in uneven baking and disappointing results.
Solution:
Always check your cake using the toothpick or cake tester method. You can also check the edges: if they start pulling away from the pan, that’s a good indication that the cake is done. Trust the test, and be patient before removing your cake from the oven.
Final Thoughts on Common Mistakes
Baking a heart-shaped cake doesn’t have to be daunting. By avoiding these common mistakes, you’ll be able to achieve a perfect, heart-shaped cake every time. From properly preparing your cake pan to choosing the right frosting, each step is important in ensuring your cake is a success. Remember, practice makes perfect, so keep experimenting, and soon, you’ll be an expert at baking beautiful heart-shaped cakes!
Easy Decorating Ideas for Heart-Shaped Cakes
Buttercream Piping Techniques
Buttercream piping is one of the most popular and versatile ways to decorate cakes, especially when creating intricate designs on heart-shaped cakes. With a bit of practice and the right tools, you can turn your simple cake into a work of art. Buttercream is not only delicious but also holds its shape well, making it perfect for creating piped flowers, borders, and other detailed decorations. Whether you’re a beginner or a seasoned baker, mastering buttercream piping techniques will elevate your heart-shaped cake decorating skills.
Choosing the Right Buttercream for Piping
The first step in successful piping is to choose the right type of buttercream. Different types of buttercream have varying consistencies and are suited to different decorating techniques:
- American Buttercream:
This is the most commonly used buttercream for piping due to its ease of preparation and versatility. It’s thick and easy to pipe, making it perfect for basic designs and decorative borders. - Swiss Meringue Buttercream (SMBC):
Swiss meringue buttercream is smoother and silkier than American buttercream, making it perfect for more delicate and refined piping. However, it can be trickier to work with, as it requires more precise temperature control. - Italian Meringue Buttercream (IMBC):
Known for its light, airy texture, Italian meringue buttercream is a great option for intricate piping designs. It’s less sweet than American buttercream and has a glossy finish, ideal for creating smooth and elegant details on cakes. - Buttercream Consistency:
Regardless of the type, ensure your buttercream has the right consistency for piping. The ideal consistency should be thick enough to hold its shape but soft enough to pipe easily. If the buttercream is too stiff, it will be difficult to pipe, while too runny buttercream may not hold its shape.
Essential Piping Tools
To achieve beautiful piping effects on your heart-shaped cake, it’s essential to have the right tools:
- Piping Bags:
Use a disposable or reusable piping bag for easy control over your piping. Ensure it’s durable and large enough to hold a generous amount of buttercream. For fine details, smaller piping bags are more effective. - Piping Tips:
The piping tip you use will dictate the design and texture of the piping. Here are some popular piping tips:- Round Tip (#1, #2, #3): Used for writing, fine details, or simple borders.
- Star Tip (#21, #32, #1M): Great for making rosettes, shells, and decorative borders.
- Petal Tip (#104, #125): Used for making flower petals, ruffles, and lace effects.
- Leaf Tip (#67, #352): Perfect for creating realistic leaves and greenery.
- Piping Couplers:
A piping coupler allows you to easily switch between different piping tips without changing the piping bag. This is especially helpful if you want to experiment with different designs or colors. - Turntable:
A cake turntable is a helpful tool when decorating your cake. It makes it easier to pipe evenly around the entire cake without having to move the cake itself. You can simply spin the cake as you pipe. - Spatula and Scraper:
While not strictly part of the piping process, a spatula and scraper are essential for smoothening the surface of your cake before piping. They help create a clean base for your piping design.
Basic Buttercream Piping Techniques
Piping buttercream is an essential skill when decorating cakes, especially heart-shaped ones. With a little practice and the right techniques, you can create beautiful designs. Here, we’ll explore the basics of piping, from creating simple borders to more intricate flower designs.
Choosing the Right Piping Tip
The piping tip you use can drastically change the look of your buttercream decorations. There are various types of piping tips, each designed for a different effect. Some of the most popular tips include:
- Round Tips (Tip #1, #2, #3): Ideal for creating fine lines, dots, and writing.
- Star Tips (Tip #16, #18): Perfect for creating ruffles, flowers, and borders.
- Leaf Tips (Tip #67, #349): Great for piping delicate leaves or flower petals.
Each tip allows for a variety of designs depending on how you hold the piping bag and the pressure you apply.
Mastering Basic Techniques
Here are some of the essential piping techniques to master:
- Rosettes: A popular design for heart-shaped cakes, rosettes are created by starting in the center and piping in a circular motion outward. Once you’ve made the first rosette, you can continue piping around it, overlapping slightly with the previous rosette.
- Borders: Simple borders are a great way to finish off your cake. Using a star tip, pipe evenly spaced scallops along the edges of the cake for a decorative touch.
- Shells: The shell pattern is perfect for creating elegant details along the borders or the sides of your cake. To pipe shells, apply pressure to the piping bag, and quickly release it while making a “C” shape with the tip.
Tips for Perfect Buttercream Piping - Use the Right Consistency: Your buttercream should be stiff enough to hold its shape but soft enough to pipe smoothly. If it’s too stiff, add a small amount of milk or water to loosen it. If it’s too soft, chill it slightly before piping.
- Practice on Parchment Paper: Before decorating your cake, practice piping on a piece of parchment paper to get comfortable with the technique.
- Work in Small Sections: If you’re decorating a large cake, pipe in small sections to ensure the buttercream doesn’t start to dry out before you finish.
Advanced Buttercream Piping Techniques
Once you’ve mastered the basics, you can move on to more advanced piping techniques to elevate your designs:
- Piping Ruffles:
To create a ruffled effect, use a petal tip (#104). Hold the piping bag at a 45-degree angle and pipe a zigzag pattern, allowing the buttercream to fold over itself in soft, ruffled layers. You can pipe ruffles along the edges of your heart-shaped cake or in the center to create a dramatic focal point. - Piping a Lace Effect:
To achieve a lace effect, use a small round tip (#1 or #2) and pipe fine, delicate lines on your cake. Begin by piping a series of loops and swirls, creating an intricate lace pattern. This technique adds a touch of elegance to any heart-shaped cake. - Piping Intricate Flowers:
For more intricate flowers, like peonies or hydrangeas, start by piping a base layer of smaller petals using a petal tip (#104). Once the base layer has set, pipe larger petals on top to create depth and dimension. This technique takes some practice, but the results are stunning. - Ombre Effect:
The ombre effect is a popular trend in cake decorating, and it can be easily achieved with buttercream. Simply pipe buttercream in layers of different shades, starting with the darkest color at the bottom and gradually lightening as you move toward the top of the cake. Use a spatula to smooth out the layers for a seamless gradient.
Final Thoughts on Buttercream Piping Techniques
Mastering buttercream piping is a fun and creative way to decorate heart-shaped cakes. With the right buttercream consistency, piping tips, and techniques, you can achieve stunning designs that will impress your guests. Remember, practice makes perfect! So, take your time, experiment with different designs, and soon you’ll be able to create intricate and beautiful piped decorations that turn your heart-shaped cake into a true masterpiece.
Edible Decorations for Heart-Shaped Cakes
Edible decorations are an excellent way to personalize and elevate your heart-shaped cakes. Whether you’re looking to add a touch of elegance, whimsy, or a splash of color, edible decorations offer a variety of creative options. From fresh flowers to sugar-crafted designs, these decorations can enhance the visual appeal of your cake while remaining entirely edible and delicious. Let’s explore some of the best edible decoration options for your heart-shaped cake.
1. Fresh Flowers
Fresh flowers are a timeless and elegant decoration for heart-shaped cakes, especially for romantic occasions like weddings, anniversaries, or Valentine’s Day. The beauty of fresh flowers is that they add natural color and texture to the cake, making it look vibrant and sophisticated. However, it’s important to use edible flowers or those that are safe to eat.
Common Edible Flowers to Use:
- Roses: A classic choice for heart-shaped cakes, symbolizing love and romance. Petals can be scattered on top or arranged in a flower crown.
- Lavender: Offers a subtle fragrance and purple hue that complements many cake flavors, such as lemon or vanilla.
- Violets: Sweet and colorful, these small flowers add a whimsical touch to your cake.
- Chamomile: Light and delicate, chamomile flowers create a soft, natural look on your cake.
- Marigolds: Bright and cheerful, perfect for adding a pop of color.
Tip: Always ensure that the flowers are pesticide-free and safe for consumption. If you’re unsure, check with the florist or use edible flower petals from a reputable source.
2. Fondant Decorations
Fondant is a smooth, pliable sugar paste that can be rolled out and molded into a variety of shapes and designs. It’s a favorite for creating clean, polished decorations on heart-shaped cakes. Fondant can be used to create detailed, custom flowers, intricate patterns, or even cover the entire cake for a smooth finish.
Popular Fondant Decorations:
- Fondant Flowers: You can create beautiful roses, daisies, or even succulents out of fondant. These flowers can be arranged on top of the cake or used as a border.
- Fondant Hearts: Small fondant hearts in varying sizes can be scattered across the cake or arranged to create a focal point.
- Fondant Ribbons: Decorative fondant ribbons can be piped around the edges of the heart-shaped cake, adding a polished look.
- Fondant Figures: Create intricate figurines like couples, animals, or themed designs to personalize the cake.
Tip: When using fondant, ensure your cake is properly iced to prevent the fondant from drying out or sticking to the cake. You can also paint fondant decorations with edible food colors to add more details.
3. Sugar Flowers and Decorations
Sugar flowers are an elegant and sophisticated option for heart-shaped cakes. These are flowers made from edible sugar paste, which is rolled out and shaped into realistic flowers like roses, peonies, lilies, and orchids. Sugar flowers can be handcrafted to mimic real-life flowers, adding a delicate, artistic touch to your cake.
Popular Sugar Decorations:
- Sugar Roses: A popular choice for romantic cakes, sugar roses are often used to symbolize love and passion.
- Sugar Leaves: Pairing sugar flowers with realistic sugar leaves can create a natural, garden-inspired look.
- Sugar Butterflies: Small, delicate sugar butterflies can be placed on your heart-shaped cake to add a whimsical, fairy-tale touch.
Tip: Sugar flowers can be made in advance and stored in an airtight container, allowing you to plan ahead. They can also be painted with edible dust or color to match your cake’s theme.
4. Edible Glitter and Sprinkles
Edible glitter and sprinkles add a magical, sparkling touch to any cake. They’re perfect for creating a celebratory atmosphere, especially for special events like weddings, birthdays, or Valentine’s Day. Edible glitter is available in a variety of colors, so you can easily match it to your cake’s theme or color scheme.
Types of Edible Glitter and Sprinkles:
- Glitter Dust: Available in fine or chunky textures, glitter dust can be brushed onto the cake’s surface to create a shimmering effect.
- Colored Sprinkles: These come in various shapes and sizes, from classic rainbow sprinkles to heart-shaped sprinkles, making them ideal for a fun, festive look.
- Pearlized Sprinkles: These add a luxurious, sophisticated touch to your heart-shaped cake with their soft, iridescent finish.
- Edible Gold or Silver Leaf: A more opulent choice, gold and silver leaf can be carefully placed onto the cake to add a high-end, elegant look.
Tip: Be sure to use edible glitter that’s labeled safe for consumption. Regular craft glitter is not edible and should never be used for decorating cakes.
5. Chocolate Decorations
Chocolate is not only delicious but also incredibly versatile when it comes to cake decoration. From chocolate shards to sculpted chocolate roses, you can use chocolate in various forms to create both bold and delicate designs on your heart-shaped cake. Chocolate adds both texture and a rich flavor, making it a popular choice for cake decorators.
Chocolate Decoration Ideas:
- Chocolate Curls: Create chocolate curls by scraping the surface of a block of chocolate with a vegetable peeler. These curls can be arranged around the edges of the heart-shaped cake for a whimsical, textured look.
- Chocolate Shards: Break sheets of tempered chocolate into jagged shards and place them on top of your cake for a dramatic, modern look.
- Chocolate Flowers: Use a silicone mold to create intricate chocolate flowers, such as roses or lilies, to adorn your cake.
- Chocolate Drips: For a trendy and indulgent touch, drizzle melted chocolate over the sides of the heart-shaped cake, allowing it to drip down the edges.
Tip: Ensure that your chocolate is properly tempered to achieve the perfect glossy finish and to avoid any unwanted cracking.
6. Fruit and Berries
Fresh fruit and berries are a refreshing and natural decoration for heart-shaped cakes, especially during warmer months. The vibrant colors of fresh fruit add a pop of brightness to your cake, making it visually appealing and giving it a fresh, sweet flavor. Common fruits like strawberries, raspberries, blueberries, and citrus can be arranged elegantly on top of the cake.
Fruit Decoration Ideas:
- Sliced Strawberries: Their red color and heart-like shape make them perfect for decorating a heart-shaped cake.
- Fresh Berries: Blueberries, raspberries, and blackberries can be scattered around the cake to add texture and a burst of color.
- Citrus Slices: Thin slices of oranges, lemons, or grapefruits can add a refreshing look to your cake and contrast beautifully with the sweetness of the cake.
- Edible Fruit Flowers: Slice fruits like kiwi, mango, or apples into thin layers to create decorative patterns.
Tip: When using fresh fruit, ensure that the fruit is thoroughly dried before placing it on the cake to prevent excess moisture from affecting the buttercream or fondant.
7. Nuts and Seeds
Nuts and seeds are great for adding texture and a nutty flavor to your cake. They’re also a perfect choice if you’re looking to create a more rustic or earthy look on your heart-shaped cake.
Nut and Seed Decoration Ideas:
- Almonds: Slice almonds thinly and scatter them over your cake for a crunchy topping.
- Pistachios: Chopped pistachios add a vibrant green color and a slight saltiness that pairs well with sweet cakes.
- Chia Seeds: A subtle decoration, chia seeds can add a modern, health-conscious twist to your cake.
Tip: Toast the nuts lightly before using them to bring out their flavor and enhance their texture.
Final Thoughts on Edible Decorations
Edible decorations are a wonderful way to personalize and elevate your heart-shaped cake. With so many options available, from fresh flowers to intricate sugar decorations, you can create a cake that is as beautiful as it is delicious. By choosing the right edible decor for your cake, you can ensure that it not only looks stunning but also adds layers of flavor and texture to every bite. So, get creative, have fun, and let your heart-shaped cake be a true masterpiece!
Messages on the Cake
Adding a message to your heart-shaped cake is a thoughtful and personal touch that can turn an ordinary cake into a meaningful gesture. Whether you’re celebrating a special occasion like Valentine’s Day, an anniversary, or a wedding, or simply want to send a message of love, joy, or encouragement, writing on the cake helps convey your emotions in a way that enhances the cake’s significance. There are many ways to write messages on a cake, ranging from simple greetings to elaborate quotes. Let’s explore some creative ideas and tips for adding messages to your heart-shaped cake.
1. Writing with Buttercream
Buttercream is one of the most popular mediums for writing messages on cakes, thanks to its smooth consistency and versatility. Whether you’re piping a simple “Happy Birthday” or an elaborate message, buttercream offers great flexibility for customization.
How to Write with Buttercream:
- Choose the Right Tip: For fine lettering, a small round piping tip (like #1 or #2) is ideal. A larger round tip may work for bolder letters, while a star tip can create a textured or fun look.
- Consistency of Buttercream: The buttercream should be thick enough to hold its shape but smooth enough to flow from the piping bag. If it’s too soft, the message might not hold, and if it’s too stiff, it will be difficult to pipe.
- Practice First: Before writing directly on your cake, practice piping the message on parchment paper to get the feel of your hand movement and ensure the letters are even.
- Piping the Message: Start by writing your message in the center of the cake or along the border, depending on the size of the cake and the message. Keep your hand steady and move slowly to ensure each letter is clean and legible.
Tip: To make the message stand out, you can outline it with contrasting colored buttercream or add small decorative touches around the message, like small flowers or stars.
2. Using Fondant for Precise Letters
Fondant is another great option for adding messages to a cake, especially if you’re aiming for a clean, polished look. Fondant letters can be cut out using letter cutters or shaped by hand to create neat, uniform text.
How to Use Fondant for Messages:
- Roll Out the Fondant: Roll out a thin layer of fondant on a flat surface dusted with cornstarch or powdered sugar to prevent sticking.
- Cut the Letters: Use letter-shaped fondant cutters to create individual letters for your message. You can also use a sharp knife to cut out freehand letters if you prefer a more custom, artistic look.
- Attach the Letters: Lightly brush the back of each fondant letter with a little water or edible glue and carefully place them on the cake. Arrange the letters neatly, ensuring they are evenly spaced.
- Adding Texture: For a unique look, you can emboss fondant letters with a decorative pattern or lightly paint them with edible food color.
Tip: If you’re using fondant for the entire cake, consider using fondant lettering for consistency in the design, but you can also pair it with buttercream elements for a contrasting look.
3. Edible Markers for Simple Writing
For quick, easy, and precise messages, edible markers are an excellent choice. These markers work much like regular pens but contain food-safe ink that is safe to use on cakes. Edible markers are ideal for writing messages, especially if you’re short on time or want a clean, neat finish without the need for piping.
How to Use Edible Markers:
- Choose the Right Marker: Edible markers come in a range of colors. Black is ideal for standard writing, while vibrant colors can add a pop of personality to your message.
- Write Directly on the Cake: You can write directly on the cake’s surface, whether it’s buttercream, fondant, or ganache. Be sure the surface is smooth to ensure the marker glides easily.
- Handwriting Tips: If you’re not confident in your handwriting, you can use a stencil or ruler to guide the letter spacing and alignment. However, a natural, handwritten look adds a personal touch that often feels more authentic.
Tip: Edible markers are perfect for smaller messages, like names, dates, or short quotes. They’re especially useful for cakes where you want a clean, minimalist look without too much fuss.
4. Writing with Chocolate
Chocolate is an indulgent and delicious way to write messages on cakes. It offers a rich contrast to the sweetness of buttercream and is particularly fitting for cakes with chocolate flavors. You can use either melted chocolate or chocolate ganache to pipe your message onto the cake.
How to Write with Chocolate:
- Melt the Chocolate: Melt your chocolate in a microwave or using a double boiler until it’s smooth. Let it cool slightly before using it for piping.
- Piping Bag: Transfer the melted chocolate into a piping bag or use a plastic sandwich bag with the tip of the corner snipped off for a more controlled flow.
- Pipe Your Message: Just like with buttercream, you can pipe your message directly onto the cake. The key is to work quickly before the chocolate hardens, and keep your hands steady for clear, legible letters.
Tip: Chocolate can be used to create both fine details and bolder designs. You can also drizzle melted chocolate around the edges of the cake for added flair or use it to form decorative patterns around the message.
5. Customized Sugar Sheets
For those who want to create precise, professional-looking messages, sugar sheets are a fantastic option. Sugar sheets are thin, flexible sheets of edible paper that can be printed with any design or message, making them perfect for detailed writing or custom logos.
How to Use Sugar Sheets:
- Pre-Printed Sheets: Some sugar sheets come pre-printed with designs or messages, but you can also customize them by printing your own message using an edible printer.
- Cutting and Applying: Simply cut the sugar sheet to the desired size, and attach it to your cake’s surface using a little water or edible glue. Sugar sheets can be placed on fondant, buttercream, or ganache for a smooth finish.
- Message Design: Customize your message with fonts, colors, and patterns, making it as simple or intricate as you like. Sugar sheets allow for perfect precision in writing.
Tip: Sugar sheets are ideal for high-detail cakes, such as wedding cakes or cakes for corporate events, where a clean, uniform look is desired.
6. Hand-Painted Messages
For a more artistic approach, you can hand-paint messages on your heart-shaped cake using edible food colors or food-safe paints. This technique allows for a high level of customization and creativity, from simple text to intricate designs.
How to Hand-Paint Messages:
- Prepare the Surface: Ensure your cake surface is smooth and free of any excess moisture. Buttercream, fondant, or ganache all work well for hand-painting.
- Food Colors: Use edible food paints or gel colors diluted with a little alcohol (such as vodka) to create a paint-like consistency. A fine brush will help you achieve precise letters and details.
- Creating the Message: Use your brush to carefully paint the message onto the cake. If you’re not confident in your painting skills, you can lightly outline the message with a pencil or edible marker before painting.
Tip: Hand-painting is ideal for creating a unique, artistic message on your cake, especially for themed or artistic cakes. Be patient and take your time to ensure clean, crisp lettering.
Final Thoughts on Messages on the Cake
Messages on a heart-shaped cake add a personal touch and make the celebration even more memorable. Whether you choose buttercream piping, fondant letters, edible markers, or even hand-painting, there are plenty of ways to express your message with style and creativity. The right message can transform your cake from a delicious treat into a heartfelt gesture, whether you’re celebrating love, joy, or any special moment in life. Remember to keep the tone and theme of the occasion in mind, and don’t be afraid to get creative with your cake’s message!
Flavors to Elevate Your Heart-Shaped Cakes

Vanilla and Chocolate Combos
The combination of vanilla and chocolate is a timeless duo that pleases almost everyone’s taste buds. The smooth, subtle flavor of vanilla pairs wonderfully with the rich, bold taste of chocolate, making it an ideal choice for heart-shaped cakes meant for a variety of occasions. Whether you’re baking for a birthday, anniversary, or simply a special celebration, vanilla and chocolate combos add both depth of flavor and aesthetic appeal to your heart-shaped cake. Let’s explore the best ways to use this classic pairing and create a show-stopping dessert.
1. Classic Vanilla and Chocolate Swirl Cake
A vanilla and chocolate swirl cake is a visually stunning option that combines the best of both worlds. By swirling vanilla and chocolate batters together, you create a cake with alternating layers of light, fluffy vanilla and rich, dense chocolate. This style works particularly well with a heart-shaped cake, as the swirls form a beautiful pattern when sliced, adding both flavor and elegance to your dessert.
How to Make a Swirl Cake:
- Prepare Two Batters: Start by preparing two separate batters: one vanilla and one chocolate. For the chocolate batter, you can use cocoa powder, melted chocolate, or chocolate chips, depending on the desired depth of flavor.
- Layer and Swirl: Alternate spooning the batters into the cake pan, creating a layered effect. Once both batters are in, use a skewer or knife to swirl them together. Be careful not to overmix; you want the swirls to remain distinct for the best visual effect.
- Baking: Bake the cake as usual, making sure to check for doneness with a toothpick or cake tester. The result will be a moist and visually striking cake with each slice showcasing the beautiful swirl of vanilla and chocolate.
Tip: For extra flair, you can marble the top of the cake with more chocolate ganache or buttercream in a swirl pattern before serving.
2. Half-and-Half Cake Design
For a more dramatic look, consider dividing the heart-shaped cake into two halves: one half covered in rich, creamy chocolate, and the other half adorned with smooth vanilla frosting. This half-and-half design creates a visually striking contrast and allows for two distinct flavors in each slice. It’s perfect for those who can’t decide between chocolate and vanilla and want to indulge in both flavors simultaneously.
How to Achieve the Half-and-Half Look:
- Divide the Cake: Once the cake is baked, allow it to cool completely. Then, use a serrated knife to carefully slice the cake in half (either horizontally or vertically, depending on the desired effect).
- Apply Frosting: Apply chocolate frosting or ganache to one half of the cake, and vanilla frosting or buttercream to the other half. You can create clean, sharp lines between the two flavors for a bold contrast or add some soft blending for a more subtle transition.
- Decorate: For added decoration, you can top each half with complementary toppings. For the chocolate half, consider using chocolate shavings, cocoa powder, or chocolate chips. For the vanilla half, try using sprinkles, edible flowers, or fresh berries.
Tip: You can also add an optional layer of chocolate ganache in between the cake layers to enhance the chocolate flavor while maintaining the contrast with the vanilla layer.
3. Chocolate-Covered Vanilla Cake Layers
Another way to incorporate both flavors is by using chocolate to cover the outside of the cake while keeping the interior filled with fluffy vanilla layers. This technique creates a rich contrast between the soft, buttery vanilla sponge inside and the decadent chocolate coating on the outside. It’s a great way to balance the lighter flavor of vanilla with the richness of chocolate.
How to Make Chocolate-Covered Vanilla Layers:
- Bake the Vanilla Cake Layers: Start by baking your favorite vanilla sponge or chiffon cake. Once it has cooled, slice it into even layers.
- Prepare Chocolate Ganache or Fondant: Prepare a smooth chocolate ganache by melting chocolate and mixing it with cream, or roll out chocolate fondant for a more polished look.
- Layer and Coat: Stack the vanilla cake layers, and then coat the entire cake with the chocolate ganache or fondant. For a ganache finish, pour the ganache over the top of the cake and allow it to drip down the sides. For fondant, carefully roll out the fondant and drape it over the cake, smoothing the surface for a sleek finish.
- Decorate: To further enhance the look, you can add edible decorations, like chocolate curls, berries, or sprinkles, to complement the vanilla and chocolate combination.
Tip: For added texture, you can incorporate chocolate chips or shavings between the layers of the vanilla cake to give the cake a little extra crunch and flavor.
4. Chocolate Ganache and Vanilla Buttercream Frosting
Combining chocolate ganache and vanilla buttercream frosting is a perfect way to bring together both flavors in a harmonious and indulgent way. The chocolate ganache provides a smooth, glossy finish that’s rich and decadent, while the vanilla buttercream is light, sweet, and airy, offering a perfect balance of texture and flavor.
How to Create a Ganache and Buttercream Combo:
- Prepare Chocolate Ganache: Melt together high-quality dark or milk chocolate with heavy cream to create a silky ganache. Allow it to cool slightly before using it to frost the cake.
- Prepare Vanilla Buttercream: In a separate bowl, make a classic vanilla buttercream by whipping together butter, powdered sugar, vanilla extract, and a splash of milk or cream. Whip until light and fluffy.
- Frost the Cake: Start by applying a thin layer of vanilla buttercream on the cake as the base coat. Then, pour the chocolate ganache over the top of the cake, allowing it to drip down the sides. The result will be a beautiful combination of both flavors, with the rich chocolate ganache contrasting against the light vanilla buttercream.
Tip: To make this combo even more decadent, you can pipe additional buttercream rosettes or swirls around the edges of the cake, adding more texture and visual appeal.
5. Chocolate and Vanilla Cupcakes in One Cake
For a fun twist, you can incorporate both chocolate and vanilla cupcakes inside a heart-shaped cake. This technique creates a surprise inside the cake that will wow your guests when the cake is sliced open. You can arrange chocolate cupcakes in a specific pattern or scatter them throughout the cake, creating a mix of both flavors in every bite.
How to Make Chocolate and Vanilla Cupcakes in One Cake:
- Prepare the Cupcakes: Bake both vanilla and chocolate cupcakes using standard cupcake recipes.
- Cut Out Holes in the Cake: Bake your heart-shaped cake in a standard pan and once it cools, carefully carve out holes in the center, making sure the edges are clean and even.
- Place Cupcakes Inside: Arrange the chocolate and vanilla cupcakes in the hollowed-out cake, filling the holes with a mix of both flavors. You can alternate the flavors for a visually interesting effect or create specific patterns.
- Frost the Cake: Once the cupcakes are placed inside, frost the entire cake with either vanilla or chocolate frosting, or a combination of both, to complete the design.
Tip: This cake works especially well for larger gatherings where you want to offer a variety of flavors, and it’s perfect for celebrations that involve both chocolate lovers and vanilla fans.
Final Thoughts on Vanilla and Chocolate Combos
Vanilla and chocolate combos are a perfect way to balance two beloved flavors, creating a cake that satisfies all tastes. Whether you’re swirled, stacked, or layered, these combinations add both flavor depth and visual appeal to your heart-shaped cake. From the classic swirl cake to creative layered designs and unexpected fillings, there are endless possibilities for bringing together vanilla and chocolate. Experiment with different textures, frostings, and fillings to find the perfect combo that delights both the eyes and the taste buds!
Fruity Heart Cakes
Fruity heart cakes are a delightful and refreshing twist on traditional cake designs. The natural sweetness and vibrant colors of fruits not only enhance the flavor profile of the cake but also add an eye-catching appeal. Whether you’re making a cake for a summer celebration, a healthy dessert option, or just want to add a fruity flair to your cake, incorporating fruits can elevate your heart-shaped cake to a new level of indulgence and creativity. Let’s explore some delicious ways to incorporate fruits into your heart-shaped cake.
1. Fresh Berry-Topped Heart Cake
Berries such as strawberries, blueberries, raspberries, and blackberries are not only packed with flavor but also offer a burst of color to any cake. A fresh berry-topped heart cake can add a sweet and tangy contrast to a rich cake base like vanilla, chocolate, or even lemon. Berries can be used as a topping, filling, or even incorporated into the batter for an extra fruity surprise.
How to Create a Berry-Topped Cake:
- Base Cake: Start with a soft, fluffy vanilla or lemon cake, as these flavors pair beautifully with berries.
- Layering the Berries: After frosting the cake with buttercream or whipped cream, arrange the fresh berries on top. You can create a visually appealing design by grouping them in sections or arranging them in patterns, such as a heart shape or scattered artfully across the cake.
- Filling the Cake with Berries: To add an extra fruity punch, consider layering sliced strawberries, raspberries, or blueberries between the cake layers, along with a light cream filling or lemon curd.
- Garnishing: Finish with a drizzle of fruit syrup or honey to enhance the fruit’s natural sweetness and give the cake a glossy, attractive finish.
Tip: If fresh berries are out of season, you can use fruit preserves or freeze-dried berries to achieve a similar effect.
2. Tropical Fruit Heart Cake
For a vibrant, exotic flavor, tropical fruits make a stunning addition to your heart-shaped cake. Fruits like mango, pineapple, kiwi, and passion fruit offer bold flavors and bright colors that contrast beautifully with creamy cake layers. Tropical fruit heart cakes are perfect for summer parties, beach-themed events, or even just as a way to bring a little sunshine into your day.
How to Make a Tropical Fruit Cake:
- Cake Base: A coconut-flavored cake or a light vanilla sponge makes an ideal base for tropical fruit. Coconut frosting or a coconut buttercream would also pair wonderfully with the fruit.
- Layering Tropical Fruits: Slice tropical fruits such as mangoes, kiwis, and pineapples thinly and arrange them in beautiful patterns on top of the cake. You can also puree some fruits, like mango or passion fruit, and spread them as a filling between layers of cake.
- Creating a Fruit Glaze: To give the cake a shiny finish and enhance the flavors, brush the tropical fruits with a light glaze made from fruit juice or a simple syrup.
- Additional Garnishes: Consider adding toasted coconut flakes or edible flowers like hibiscus to complement the tropical theme.
Tip: For a more indulgent version, you can incorporate tropical fruit into a creamy filling, such as coconut cream or mango mousse, for a rich yet refreshing taste.
3. Citrus Heart Cake
Citrus fruits like oranges, lemons, and grapefruits add a zesty and tangy flavor that works beautifully in cakes. A citrus heart cake offers a perfect balance between sweet and sour, making it an excellent choice for anyone who loves a bit of tartness in their desserts. The bright, refreshing citrus notes also add a fragrant appeal to the cake.
How to Make a Citrus Cake:
- Cake Base: Use a light, airy cake, such as lemon or orange chiffon cake, to complement the citrusy flavors. Alternatively, you can bake a standard vanilla cake and add citrus zest to the batter to infuse the cake with that fresh citrus aroma.
- Filling and Frosting: For the filling, you can use lemon curd, orange marmalade, or a citrus-infused buttercream. A tangy cream cheese frosting also pairs beautifully with citrus cakes, adding a creamy balance to the tart fruit.
- Citrus Decoration: For a simple yet stunning effect, garnish the cake with thin slices of citrus fruits like oranges or lemons. You can also use zest from oranges, lemons, or grapefruits to add an aromatic touch.
- Garnishing with Herbs: To add a fresh contrast, sprinkle chopped mint or basil leaves between the citrus slices for a burst of herbal flavor.
Tip: For a fancier twist, you can create candied citrus peel by simmering thin strips of citrus peel in sugar syrup until they’re tender and translucent. These can be used as a unique, edible decoration on top of your cake.
4. Fruit-Filled Heart Cake
Incorporating fresh fruit directly into the cake layers is another fantastic way to achieve a fruity heart cake. By folding fruits like strawberries, peaches, or even diced apples into the batter, you create a flavorful cake with bites of fruit in every slice. Fruit fillings can also be used to layer the cake or as a filling between cake layers for added texture and flavor.
How to Make a Fruit-Filled Cake:
- Batter Prep: Use a simple vanilla or sponge cake recipe as the base. To incorporate fruit, chop it into small, bite-sized pieces and toss it in flour before gently folding it into the cake batter. This helps prevent the fruit from sinking to the bottom during baking.
- Filling Options: Fruit fillings, like strawberry jam, raspberry coulis, or fresh mango puree, can be used between the cake layers to add moisture and a burst of flavor. You can also create a fruit compote by simmering fresh fruits with sugar and a splash of lemon juice until thickened.
- Top with Fresh Fruit: After frosting the cake, you can top it with additional fresh fruit, such as sliced strawberries, blueberries, or peaches, for an extra touch of natural sweetness.
Tip: For an elegant look, arrange the fruit on top in a symmetrical or spiral pattern, or create a cascade effect with fruits spilling down the sides of the heart-shaped cake.
5. Fruit and Cream Heart Cake
Combining fresh fruit with cream-based fillings creates a light and indulgent cake that’s both refreshing and rich. The creaminess of whipped cream or mascarpone complements the juicy, tart flavor of the fruit, creating a perfect harmony of textures. This type of cake is especially popular for spring and summer celebrations, offering a cool and light dessert option.
How to Make a Fruit and Cream Cake:
- Cake Base: Bake a light sponge or angel food cake as the base. These airy cakes allow the fruit and cream to shine without being too heavy.
- Cream Filling: Whipped cream or mascarpone frosting provides a rich, smooth base that pairs well with fruits like strawberries, blackberries, and peaches. You can also mix in a little vanilla or almond extract to add depth to the cream filling.
- Layering: Alternate between cake layers, fresh fruit, and cream. The combination of the three creates a luscious texture and flavor profile that will delight your guests.
- Finishing Touches: Top the cake with more fresh fruit, a dusting of powdered sugar, or a drizzle of fruit syrup to tie the whole dessert together.
Tip: To create a more decadent fruit and cream cake, add a layer of fruit-flavored jam, like strawberry or apricot, between the cake layers for added sweetness and richness.
Final Thoughts on Fruity Heart Cakes
Fruity heart cakes offer a refreshing and vibrant twist on the traditional cake design, providing a perfect balance of sweetness and tartness. Whether you choose to top your cake with fresh berries, incorporate tropical fruits, or fill it with citrus zest or fruit compotes, fruits bring not only beautiful colors but also delicious flavors to your heart-shaped cake. These cakes are ideal for a variety of occasions, from light summer parties to elegant events, and can be customized to suit both fruit lovers and those with a sweet tooth. Get creative with your fruit choices and let the natural sweetness of fresh fruits shine in your heart-shaped cake!
Unique Flavors
While traditional cake flavors like vanilla and chocolate will always have a place in the hearts of many, there’s something incredibly exciting about experimenting with unique and unconventional flavor combinations. Adding unique flavors to your heart-shaped cake can elevate the dessert experience and make it stand out in a memorable way. Whether you’re creating a cake for a special celebration or simply want to offer a fresh twist on a classic, introducing bold, exotic, or unexpected flavors will create a lasting impression. Let’s explore some creative ideas to help you push the boundaries of flavor while maintaining the elegance of a heart-shaped cake.
1. Lavender and Honey Cake
Lavender and honey are a sophisticated and aromatic pairing that brings a subtle floral elegance to your cake. This unique combination offers a delicate sweetness, with the honey balancing the earthy floral notes of the lavender. Lavender and honey heart cakes are perfect for romantic occasions such as anniversaries or bridal showers, where you want to create a refined, memorable dessert.
How to Create a Lavender and Honey Cake:
- Lavender Infused Cake Base: Infuse the cake batter with dried lavender buds or lavender extract. The key is to use a light, buttery cake base like a vanilla or almond cake that won’t overpower the delicate lavender flavor.
- Honey Frosting: To enhance the honey flavor, make a honey buttercream or frosting by combining honey with butter and powdered sugar. The honey will add sweetness and a floral undertone to the cake.
- Lavender and Honey Glaze: For an added touch, drizzle a lavender-honey syrup over the top of the cake. This can be made by heating honey with a few sprigs of lavender until it’s fragrant and slightly thickened.
- Decoration: Decorate the cake with a few sprigs of fresh lavender and a light dusting of edible gold leaf for a luxe, elegant finish.
Tip: Make sure to use culinary-grade lavender, as lavender from the garden may not be food-safe.
2. Earl Grey Tea Cake
Earl Grey tea, with its distinctive blend of black tea and citrusy bergamot, is a flavor that lends itself beautifully to cakes. An Earl Grey tea-infused heart cake offers a refined and aromatic taste, perfect for tea parties, weddings, or a special afternoon gathering. The fragrant notes of Earl Grey, combined with a soft, moist cake texture, create a perfect balance of flavor.
How to Make an Earl Grey Tea Cake:
- Infuse the Cake Batter: To bring out the distinct flavors of Earl Grey, steep a few tea bags in milk or cream and add this infused liquid to your cake batter. You can also use finely ground tea leaves for a stronger flavor.
- Citrus Twist: Earl Grey is known for its citrusy bergamot flavor, so adding a bit of lemon zest to the batter or frosting will help highlight this aromatic citrus note.
- Frosting: Pair the cake with a light lemon or vanilla buttercream frosting, which complements the tea’s subtle flavors. You can also make a citrus glaze to drizzle over the top of the cake for added moisture and flavor.
- Decoration: Decorate with thin slices of candied citrus fruits like lemons or oranges, or garnish with edible flowers for an elegant finish.
Tip: For an extra boost of flavor, consider filling the cake layers with a lemon curd or whipped cream infused with Earl Grey tea.
3. Matcha Green Tea Cake
Matcha, a finely powdered form of green tea, offers a vibrant green color and a rich, earthy flavor that works beautifully in cakes. The natural bitterness of matcha is balanced by the sweetness of the cake and frosting, creating a sophisticated flavor profile. A matcha heart-shaped cake is perfect for those who appreciate the unique and slightly bitter taste of green tea, making it a great choice for foodies or as a stylish option for events like birthdays and tea parties.
How to Make a Matcha Green Tea Cake:
- Matcha Cake Base: Add matcha powder to the cake batter, ensuring the green tea flavor is prominent but not overpowering. You can combine it with a light sponge or chiffon cake for an airy texture.
- Matcha Buttercream: Make a matcha buttercream by incorporating matcha powder into the frosting. The creamy texture of buttercream pairs well with the earthy taste of matcha, creating a balance of flavors.
- Matcha Syrup: To intensify the matcha flavor, you can drizzle a matcha syrup over the cake after it’s baked. This can be made by mixing matcha powder with sugar and water and heating it to create a sweet glaze.
- Decoration: Garnish with sweet red bean paste, a common pairing with matcha in Japanese desserts, or dust the top with extra matcha powder for a subtle green touch.
Tip: Matcha is best paired with complementary flavors like red bean, coconut, or white chocolate, which can add additional layers of flavor to your heart-shaped cake.
4. Rose and Pistachio Cake
The floral, slightly sweet flavor of rose and the rich, nutty flavor of pistachios create a luxurious and exotic pairing. A rose and pistachio heart cake is perfect for special occasions like weddings, anniversaries, or Mother’s Day. The delicate rose flavor adds a romantic touch, while pistachios bring a rich, earthy depth to the dessert.
How to Make a Rose and Pistachio Cake:
- Rose-Flavored Cake Base: To infuse the cake with a light, floral flavor, add rose water or rose extract to the batter. You can also fold finely ground pistachios into the cake batter to incorporate both flavors at once.
- Pistachio Buttercream: For the frosting, make a pistachio buttercream by incorporating finely ground pistachios and rose water into the buttercream. The pistachios will lend a rich, creamy texture, while the rose water will impart a fragrant floral note.
- Rose and Pistachio Topping: Garnish the top of the cake with chopped pistachios, edible rose petals, or a drizzle of rose syrup. You can also decorate the cake with gold leaf for an opulent touch.
Tip: For added moisture and flavor, you can layer the cake with a rose-infused syrup or spread a thin layer of pistachio paste between the layers.
5. Salted Caramel and Apple Cake
For a unique sweet-salty combination, a salted caramel and apple heart cake offers a sophisticated twist on classic flavors. The sweet, rich caramel sauce pairs beautifully with the tartness of apples, creating a perfect balance of flavors. This cake is ideal for fall celebrations, like autumn weddings or Thanksgiving, but can be enjoyed year-round for those who love a little salty kick with their sweetness.
How to Make a Salted Caramel and Apple Cake:
- Apple Cake Base: Start by adding fresh diced apples or apple sauce to your cake batter. The apples will keep the cake moist and provide a pleasant, natural sweetness.
- Salted Caramel Filling: Prepare a salted caramel sauce and drizzle it between the layers of cake. The salty-sweet combination of caramel will contrast beautifully with the fresh apples.
- Caramel Buttercream: Frost the cake with a salted caramel buttercream, adding a decadent, smooth finish to each slice.
- Decoration: Garnish with caramel shards or a sprinkle of flaky sea salt on top of the cake for extra flavor and texture.
Tip: If you prefer a less messy look, you can drizzle the salted caramel over the top and let it drip down the sides of the cake for a stunning, gooey effect.
Final Thoughts on Unique Flavors
Incorporating unique flavors into your heart-shaped cakes allows you to go beyond the conventional and create a dessert that’s both memorable and exciting. Whether you’re infusing your cake with floral notes like lavender and rose, earthy flavors like matcha and pistachio, or bold, contrasting combinations like salted caramel and apple, the possibilities are endless. These unique flavors not only make your cake stand out visually but also offer a new and exciting tasting experience that will surprise and delight your guests. Don’t be afraid to experiment with flavors—sometimes the most unexpected combinations create the most delicious results!
Heart-Shaped Cakes for Specific Celebrations
Valentine’s Day Cakes
Valentine’s Day is all about celebrating love, affection, and sweetness, making it the perfect occasion to showcase your baking skills with heart-shaped cakes. Whether you’re making a cake for a special someone, for a romantic gathering, or as a thoughtful gift, Valentine’s Day cakes offer endless possibilities to express your creativity and affection. From decadent chocolate creations to light, fruity delights, there’s a heart-shaped cake idea for every taste and style. Let’s dive into some delightful cake ideas and tips to make your Valentine’s Day celebration extra special.
1. Classic Red Velvet Heart Cake
Red velvet is the quintessential Valentine’s Day flavor. Its deep red color, rich texture, and subtle chocolate flavor make it a perfect match for the romantic theme of the holiday. A red velvet heart cake is a showstopper, offering both visual appeal and delicious taste. With a creamy cream cheese frosting to complement its tender crumb, this cake will surely win hearts.
How to Make a Red Velvet Cake:
- Cake Base: Prepare a classic red velvet cake by combining cocoa powder, buttermilk, and a generous amount of red food coloring. The tanginess from the buttermilk balances the sweetness of the cake, while the cocoa powder adds depth to the flavor.
- Frosting: Cream cheese frosting is the go-to option for red velvet cake. Its slight tanginess and smooth texture pair perfectly with the rich, slightly bitter notes of the cake.
- Decoration: Decorate the cake with edible gold leaf, red sprinkles, or piped buttercream rosettes. You can also add a few fresh red roses or rose petals around the cake for an elegant and romantic touch.
Tip: For an extra romantic twist, cut the cake into a heart shape before decorating or opt for small heart-shaped cake tiers to create a multi-layered, tiered effect.
2. Strawberry Shortcake Heart Cake
Strawberry shortcake is a light and fruity option for Valentine’s Day that combines the sweetness of strawberries with a delicate, airy cake. This dessert is ideal for anyone who loves a fresh, fruity cake without overwhelming sweetness. The bright, red strawberries and light whipped cream make for a refreshing and beautiful Valentine’s Day treat.
How to Make a Strawberry Shortcake Cake:
- Cake Base: Start with a fluffy sponge or angel food cake as the base. The light, airy texture of the cake pairs beautifully with the juicy strawberries and cream.
- Whipped Cream Frosting: For the frosting, whip heavy cream with a little powdered sugar and vanilla extract to create a sweet, pillowy cream. This will be the perfect topping for your strawberry layers.
- Layering with Strawberries: Slice fresh strawberries and layer them generously between the cake layers, allowing the sweetness of the fruit to meld with the whipped cream.
- Decoration: Top the cake with more fresh strawberries, some mint leaves for color, and a dusting of powdered sugar. You can also pipe additional whipped cream around the edges for an elegant look.
Tip: Consider adding a touch of strawberry jam or a homemade strawberry compote between the layers for extra flavor and moisture.
3. Chocolate-Covered Strawberry Heart Cake
Chocolate and strawberries are a classic Valentine’s Day combination, and when paired together in a heart-shaped cake, they create a luxurious and indulgent dessert. The combination of rich chocolate cake, smooth chocolate ganache, and fresh strawberries dipped in chocolate is a treat that will impress any chocolate lover.
How to Make a Chocolate-Covered Strawberry Cake:
- Chocolate Cake Base: Begin with a rich chocolate cake, either a dense flourless chocolate cake or a light and fluffy chocolate sponge, depending on your preference.
- Chocolate Ganache: Prepare a smooth ganache by melting dark or milk chocolate with heavy cream. This will be the perfect glaze to cover the entire cake and add richness.
- Chocolate-Dipped Strawberries: Dip fresh strawberries in melted chocolate and place them on top of the cake. You can also arrange them in a heart shape for extra flair.
- Decoration: Drizzle extra chocolate ganache over the top, or pipe elegant chocolate curls or rosettes around the base. The combination of the glossy ganache and the fresh strawberries will make the cake irresistible.
Tip: For an extra touch of elegance, garnish the cake with edible gold flakes or sprinkle some crushed pistachios around the edges to add color and crunch.
4. Raspberry Rose Heart Cake
Raspberry and rose is a sophisticated pairing that captures the essence of Valentine’s Day in both flavor and fragrance. The floral notes of rose and the tartness of raspberries complement each other beautifully, making this cake perfect for a romantic celebration. A raspberry rose heart cake is a wonderful option for anyone looking to explore more refined flavors.
How to Make a Raspberry Rose Cake:
- Cake Base: Use a light vanilla or sponge cake as the base. To infuse a subtle rose flavor, add a few drops of rose water or rose essence to the batter.
- Raspberry Filling: Prepare a raspberry compote by simmering fresh or frozen raspberries with sugar until thickened. This can be used as a filling between the layers or as a topping.
- Rose Buttercream: Create a rose buttercream by adding rose water to a classic buttercream frosting. The floral flavor will perfectly complement the tartness of the raspberries.
- Decoration: Garnish with fresh raspberries, edible rose petals, and a light dusting of powdered sugar. You can also pipe small roses made from buttercream around the edges for a beautiful, feminine touch.
Tip: For a refined finish, consider adding a layer of raspberry jam or a raspberry glaze over the top to enhance the fruitiness.
5. Pink Champagne Cake
For a more elegant and celebratory option, a pink champagne cake offers a unique twist on a traditional cake with the addition of sparkling wine. The delicate champagne flavor combined with a light, fluffy cake creates a sophisticated dessert that’s perfect for a Valentine’s Day toast.
How to Make a Pink Champagne Cake:
- Cake Base: To infuse the champagne flavor into the cake, substitute part of the liquid in your cake recipe with pink champagne. A light, fluffy sponge or chiffon cake works well for this style of cake.
- Champagne Buttercream: Use champagne to flavor your buttercream frosting. The addition of powdered sugar and a little vanilla extract will balance the champagne’s acidity and create a silky frosting.
- Decoration: For a luxurious touch, garnish the cake with edible glitter or gold leaf. You can also decorate with fresh berries, like strawberries or raspberries, for color and a fresh contrast.
- Finishing Touch: To enhance the celebratory vibe, drizzle a little more champagne syrup over the cake for an extra layer of flavor and shine.
Tip: If you prefer a less boozy cake, you can use non-alcoholic champagne or sparkling wine as a substitute to maintain the effervescent flavor without the alcohol content.
Final Thoughts on Valentine’s Day Cakes
Valentine’s Day cakes offer the perfect opportunity to create something truly special for your loved ones. Whether you choose a classic red velvet cake, a fruity strawberry shortcake, or a rich chocolate creation, the key is to infuse the cake with love and creativity. Heart-shaped cakes are ideal for this romantic occasion, and with the right flavors and decorations, you can make a cake that’s both beautiful and delicious. Experiment with different flavor combinations, decorations, and designs to create a memorable dessert that will make your Valentine’s Day celebration even sweeter!
Anniversary Cakes: Celebrate with the Perfect Design
An anniversary is a special occasion. It deserves to be celebrated with something memorable. A beautifully designed anniversary cake can be the centerpiece of the celebration. Whether it’s a milestone or a small gathering, the cake will delight both the eyes and taste buds. It symbolizes love, commitment, and shared memories. When designing the perfect anniversary cake, aim to reflect the couple’s journey and personalities.
Personalized Anniversary Cake Designs for Unique Celebrations
Personalizing the anniversary cake adds a special touch. Custom decorations, such as engraved initials, wedding dates, or meaningful symbols, can be included. Intricate piping, edible lace, or hand-painted details give the cake a sophisticated look. A custom cake topper, like a figurine or a wedding photo, makes it even more personal.
Ideas for Personalized Anniversary Cake Decorations:
- Cake Topper: Consider a figurine or symbol that represents the couple’s shared hobbies.
- Piping and Detailing: Use royal icing to create intricate floral designs or lace patterns.
- Edible Images: You can place a meaningful photo on the cake using edible ink.
Popular Anniversary Cake Flavors for Every Taste
When choosing the flavor, consider what the couple enjoys most. Classic options like vanilla, chocolate, or red velvet are popular. However, unique flavor combinations can better reflect the couple’s personalities. A fruit-filled cake might represent the sweetness of their years together, while a rich chocolate ganache cake reflects indulgence.
Top Anniversary Cake Flavors:
- Classic Vanilla with Buttercream: A timeless favorite.
- Chocolate Ganache Cake: Ideal for chocolate lovers.
- Lemon and Raspberry: Fresh and zesty.
- Carrot Cake with Cream Cheese Frosting: Flavorful and moist.
- Red Velvet with Cream Cheese Frosting: Symbolic of love, with tangy cream cheese.
Tiered Anniversary Cakes for Milestone Celebrations
For milestone anniversaries like a 25th or 50th, a tiered cake stands out. It allows for creativity in design and flavor. Tiered cakes can be decorated with sugar flowers, metallic accents, or lace designs. The number of tiers can represent the number of years the couple has been together. Each layer can feature a different flavor.
Tiered Cake Design Tips:
- Colors: Use gold or silver accents for special milestones.
- Decorative Flowers: Sugar flowers, like roses, peonies, or orchids, add a romantic touch.
- Personalized Details: Include elements representing the couple’s journey.
Elegant Anniversary Cakes: Glamorous and Timeless Designs
For couples who prefer elegance, choose a glamorous design. Metallic accents, delicate sugar flowers, and soft pastel shades create sophistication. Gold leaf, edible pearls, and lacework can add luxury. A sleek, modern cake with smooth fondant can give it a refined, polished appearance.
Tips for an Elegant Anniversary Cake:
- Gold and Silver Accents: Edible gold leaf or silver dragees add luxury.
- Minimalist Designs: Smooth fondant and sleek lines keep it simple yet elegant.
- Glamorous Flowers: Sugar flowers like roses and hydrangeas create a soft, romantic look.
Fruity and Fresh Anniversary Cakes: A Refreshing Twist
For lighter flavors, consider a fruity cake. Fresh fruit and light sponge cake or fruit compote offer a refreshing option. Berries like strawberries, raspberries, or blueberries bring color and freshness. Citrus fruits, such as lemon or orange, provide a zesty kick. You can also add tropical fruits like mango or coconut for an exotic twist.
Fresh and Fruity Cake Ideas:
- Strawberry Shortcake: A light cake with fresh strawberries and whipped cream.
- Lemon and Blueberry: A zesty lemon cake with blueberry filling.
- Tropical Coconut and Pineapple: A tropical twist with coconut and pineapple.
Creating a Memorable Anniversary Cake: Tips and Tricks
To ensure your anniversary cake is perfect, keep these tips in mind:
- Know the Couple’s Taste: Whether they prefer classic or modern flavors, understand their preferences.
- Balance Between Taste and Design: Make sure the cake not only looks beautiful but tastes delicious as well.
- Prepare in Advance: Start decorating early, especially if you’re using intricate details.
- Consider Dietary Restrictions: If the couple has any allergies, ensure the cake is safe for everyone.
Conclusion:
In this blog post, we’ve explored a delightful variety of heart-shaped cake ideas that will inspire you to celebrate love and special occasions. From elegant fondant designs to rich chocolate ganache cakes and fruity, fresh creations, there’s a heart-shaped cake for every taste and style. Whether you’re seeking a personalized touch, a classic design, or something unique, the possibilities are endless.
Now, we encourage you to try out your favorite designs and flavors. Experiment with different decorations, fillings, and techniques to create a heart-shaped cake that reflects your personal style or the one you’re baking for. Additionally, don’t hesitate to get creative and make the cake your own!
We’d love to hear about your cake creations! Feel free to share photos or ask questions in the comments section below. Whether you need helpful tips or just want to show off your masterpiece, we’re here to support you and celebrate with you every step of the way! Happy baking!